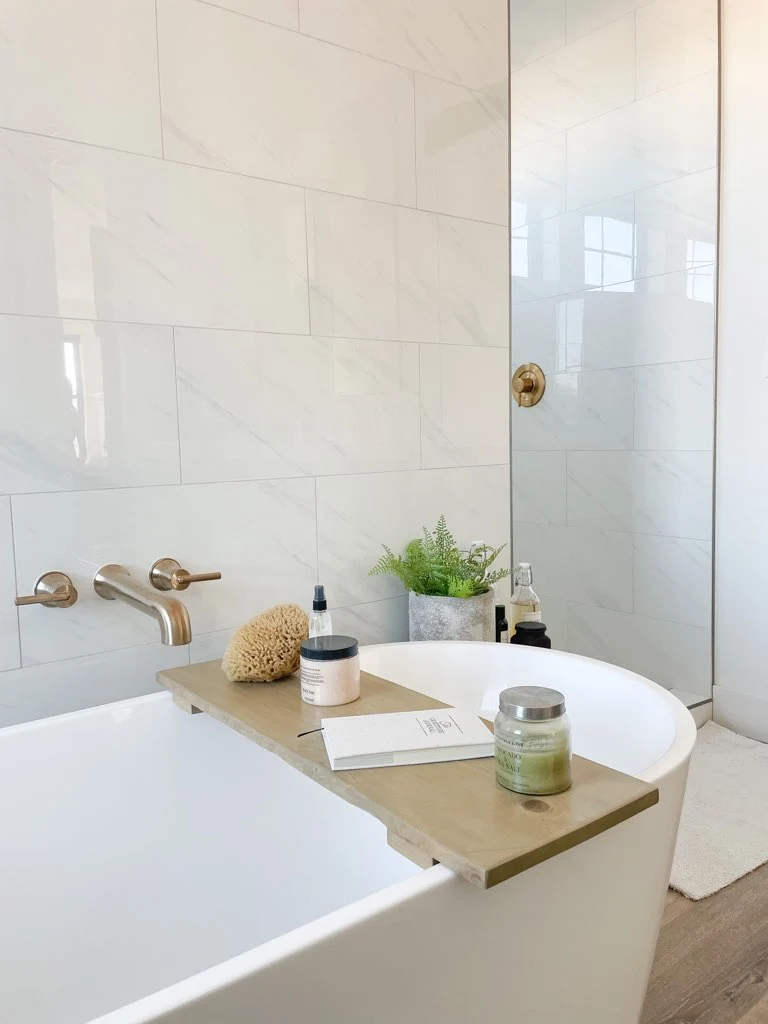
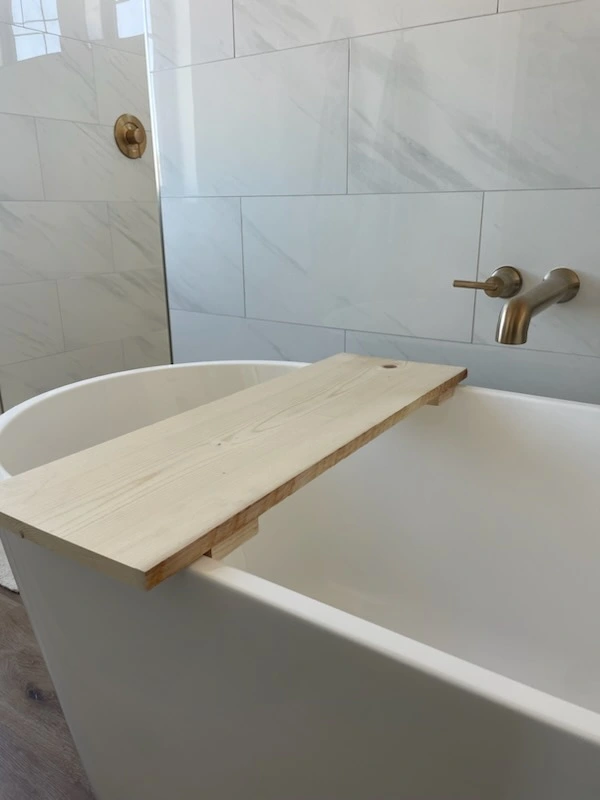
I wanted to add a tray on my bathtub for a while now. I actually bought one but it didn’t fit. So now that I’m in my new house, I’ll just make one myself.
The purpose for a bathtub tray can be functional and aesthetically pleasing to the eye. Some people use them to hold their book while reading in the tub. Others use them for a great drink table or even holding your laptop and doing some work. Regardless what you use it for, it makes a great “extra” table and holder.
This easy beginner’s project will definitely help you start your journey with DIY-ing. It’s so easy, you will think you can do any project after this one. It doesn’t matter if you have a freestanding tub, shower tub combo or drop in tub. You can make that for any tub style you have.
Items you’ll need:
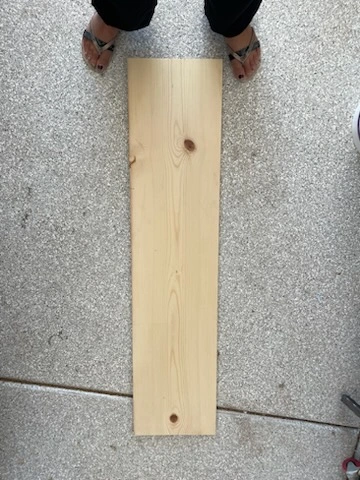
(1) 1x12x4ft Common Board
Tools & Materials
1 1/4 in Finish Nails
Wood Glue
Measuring Tape
Electric Sander (optional)
120 or 220 grit Sandpaper
Finish Nailer or Brad Nailer
Miter Saw
***If you don’t have a table or miter saw you might to able to get the cuts made at your local hardware store
Step by Step
Step 1:
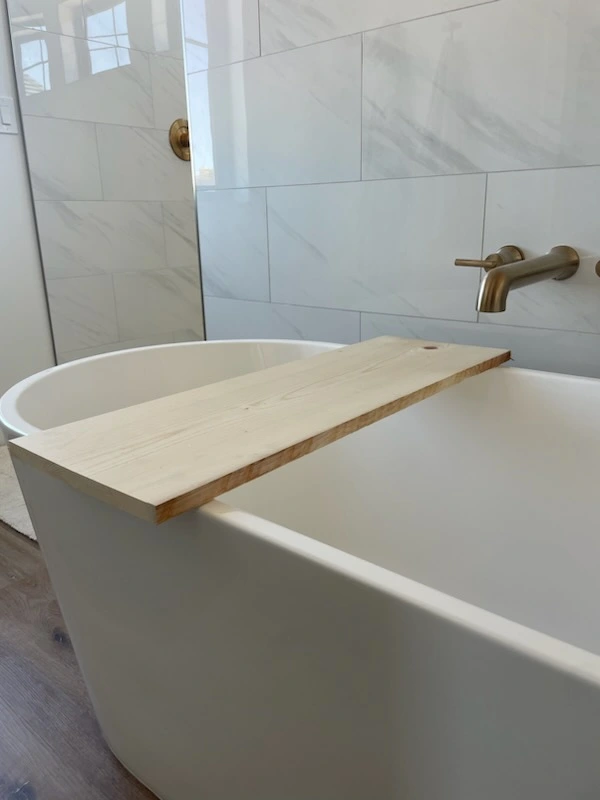
You want to see how long to make your tray. Every tub size might slightly vary in width. I wanted roughly a 2 inch over hang on my freestanding tub. So ultimately I cut my board to 33 inches.
Step 2:
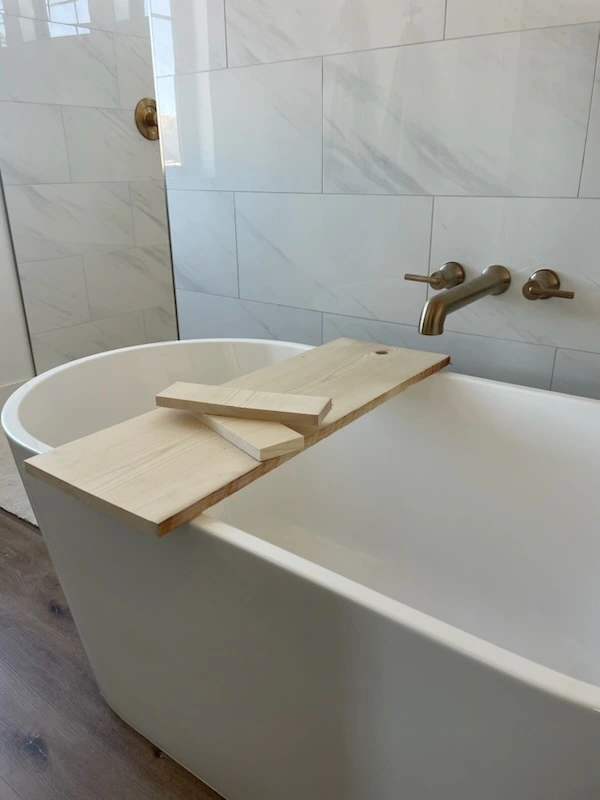
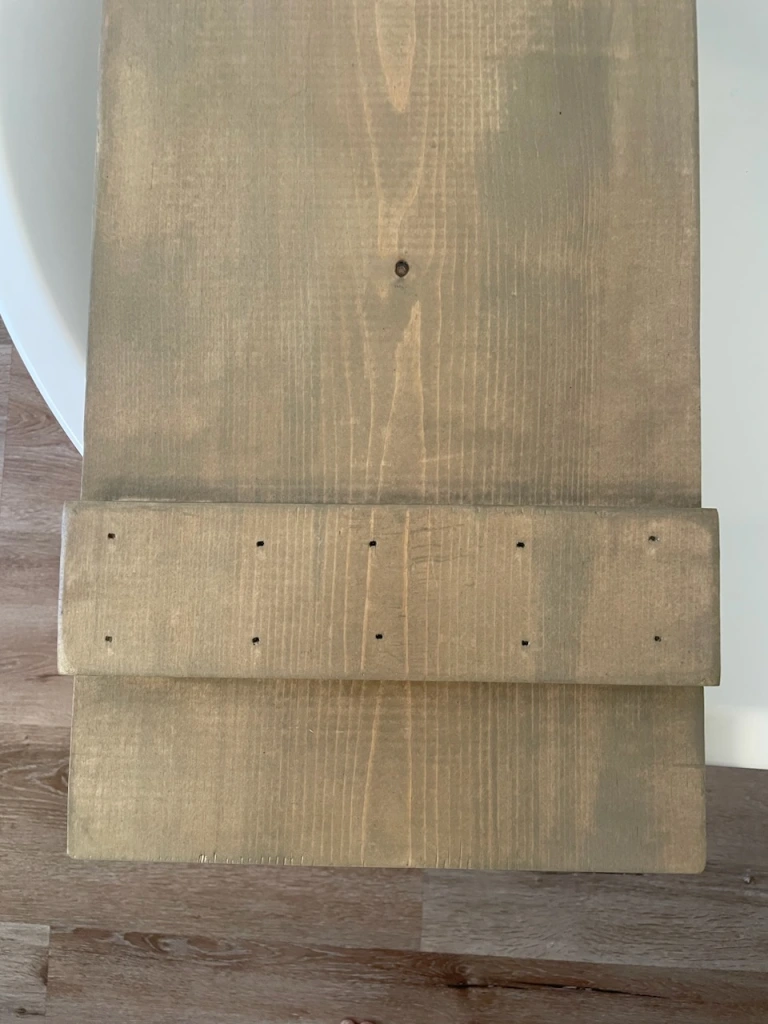
Next you need to make the “legs”. This will help you tray stay in place in between the tub and not shift from side to side. This is also a personal option on how wide to make your “legs”. I did mine 3 inches, using the scrap piece of board that I just cut. I would recommend anywhere between 1 1/2 – 4 inches. Just depending on the look you want to accomplish. nhjn
Step 3:
I found the best and easiest way to figure out where to place the legs under the board is to place your board on the tub and place your leg underneath and draw a line with a pencil on the on side where the leg is at. This will help you keep the leg where it needs to be.
Step 4:
You’ll need to glue and nail the legs in from the bottom of the board. That way you you don’t have any nails on the board of the board. The best way to do this is to clamp your pieces with the main board because the legs will be sliding around with the glue. Or you can have someone hold the pieces for you.
Step 5 & 6:
Step 5-Next it to sand your tray. I also decided to rough up the edges a little to give it a more wore and antique look.
Step 6-Lastly, you will stain and seal your tray. Let it completely dry and then its ready to be used.