How to make custom DIY exterior shutters that make your house stand out!
Items you’ll need:
Redwood Fencing Board, cut to your custom length
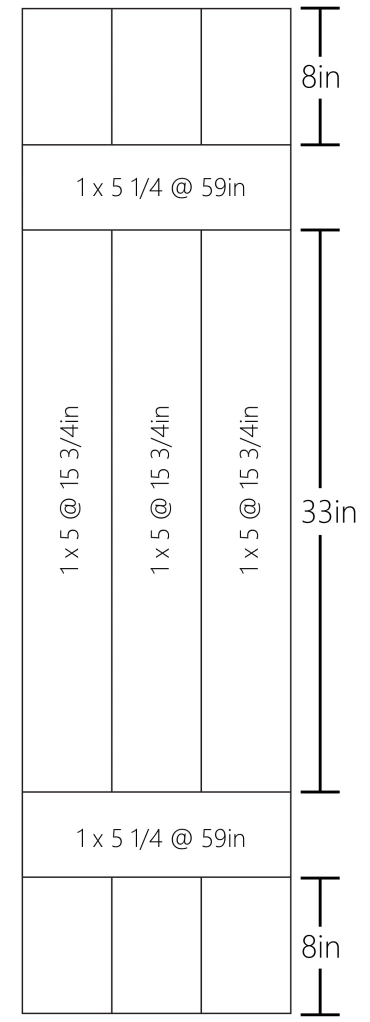
**My windows up front are 3×5 and 4×5. Measure from the top and bottom of the window frame to determine the length of the shutters. My windows aren’t a true 60in, they are actually 59in.
**Each shutter calls for 3-5 boards (depending on the length of the shutters). My shutters has 3 1/2 boards for each shutter. Each shutter costed about $15.
Tools & Materials
Wood Glue
1 1/4 Finish Nails
Stain/Paint
Varnish
Tapcon Blue Screws (3 3/4in and/or 4in)
Counter Sink Drill Bit
Drill
120 or 220 grit Sandpaper
Miter Saw
Table Saw (optional)
Step 1-Cut boards to length (and width if you want).
Step 2-Sand everything. Wipe down to get rid of dust. Stain or Paint boards. Let dry.
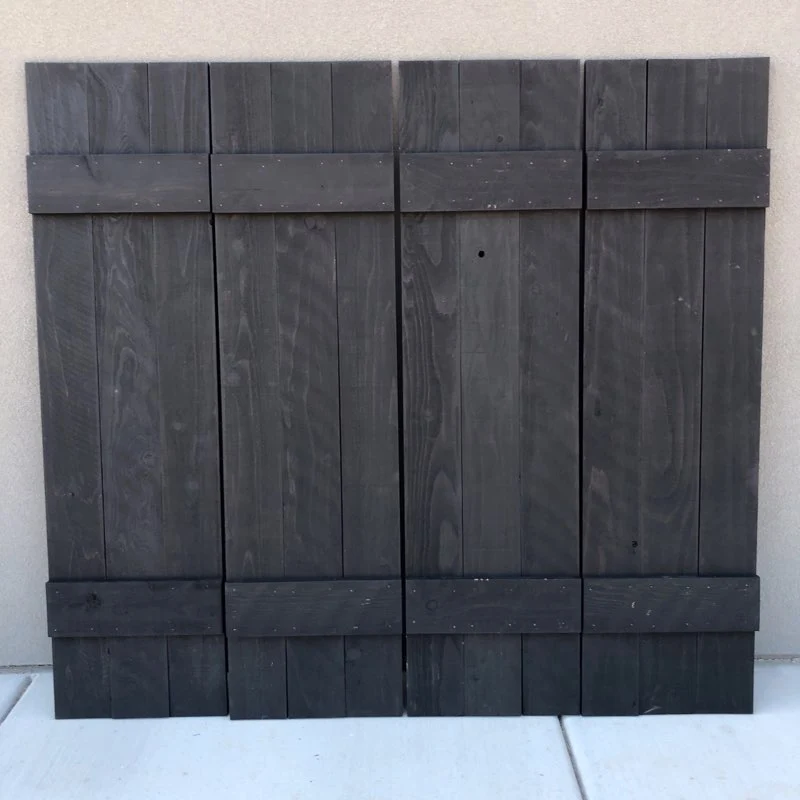
Step 3-Piece everything together. Use wood on the back of the top pieces and nail. These will hold all the boards together.
Step 4-Apply your sealer/varnish.
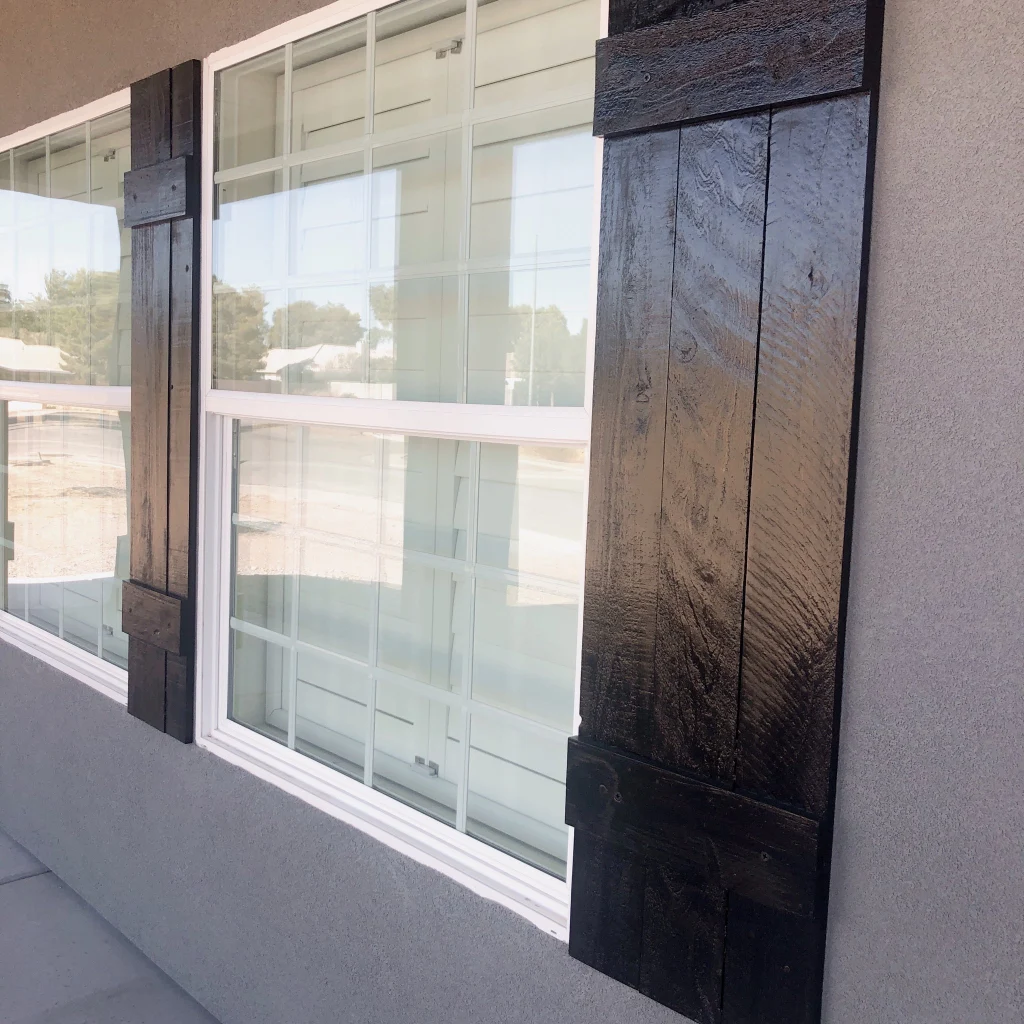
Installation Step 1-On the front pieces of the shutters, add four counter sink predrill holes. One on each side of the shutters (top and bottom).
Installation Step 2-I would definitely recommend having two people to install. Its faster and easier. Have one person hold where the shutter in place and the other screw on the shutters to the house, using the tapcon screws.
Installation Step 3-To cover the screws either paint the heads of them the sadme color as your shutter or fill them with wood filler and then paint and seal. And that’s it. It takes like 2 minutes to install each shutter.