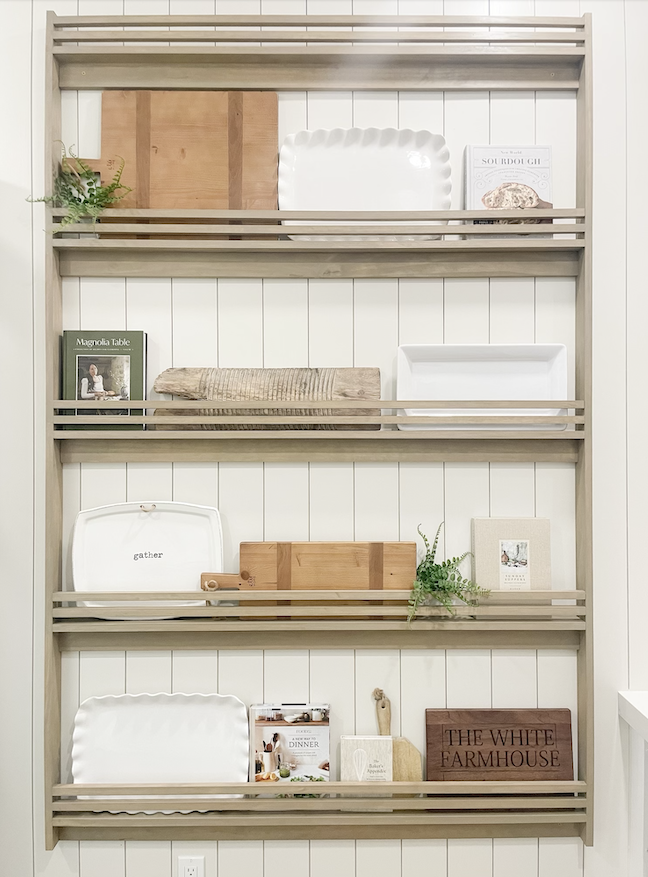
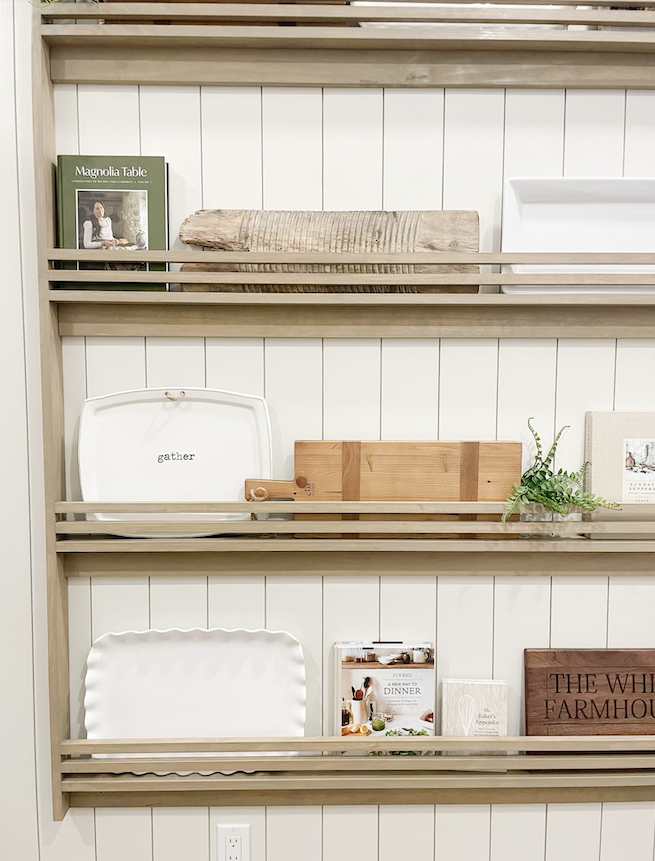
Looking for a way to display you’re pretty platters or cutting boards? Well this project is for you. Instead of hiding those pretty things let’s display them. Not only it thing a great way to add some character or make a statement in your space but it will be a lot easier to you to pick the right board or plate you need, instead of digging through the cabinet. Follow along on how to build this.
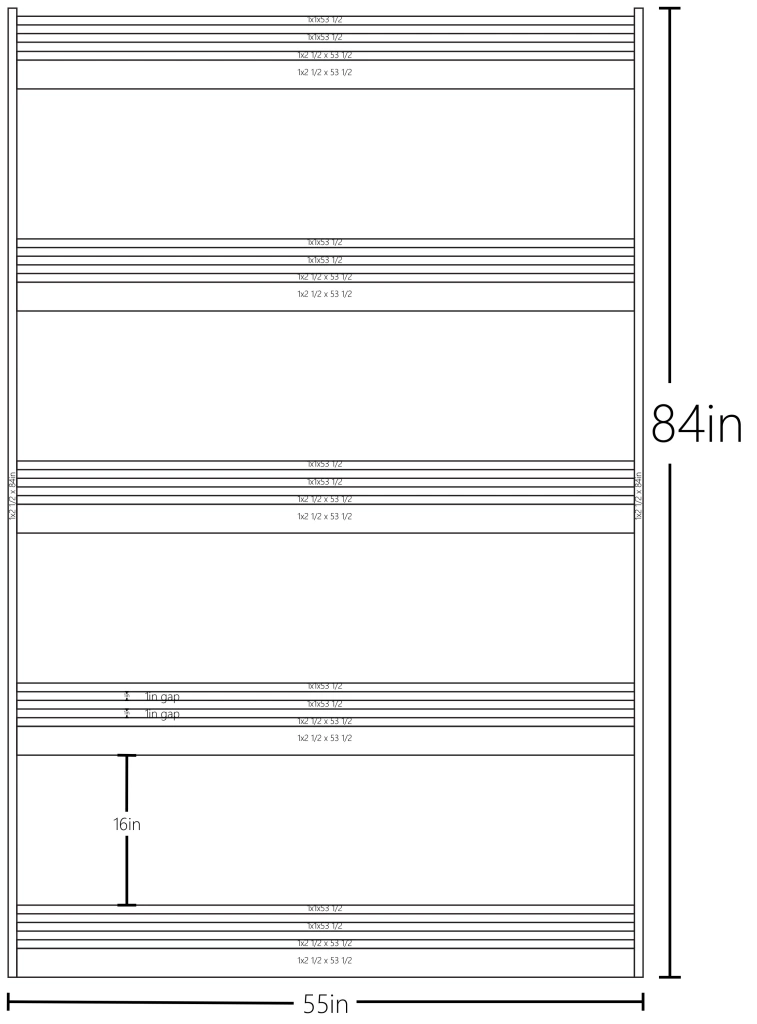
This is for a 55in wide x 7ft tall plate rack. You can adjust to any size that will work for you not change your cuts and material list to fit your needs. This project costed me about $160 in the wood material (using select pine). If you decide to use common board is would cost about $85.
Items
You will need:
(2) 1x4x8ft Select Pine, cut to 2 1/2in x 84in
(10) 1x4x6ft Select Pine, cut to 2 1/2in x 53 1/2in (the extra pieces you can leave or square them to 3/4in x 3/4in pieces)
Tools & Materials
Wood Filler
1 1/4 in Finish Nails
Wood Glue
Measuring Tape
Electric Sander (optional)
120 or 220 grit Sandpaper
Finish Nailer or Brad Nailer
Table Saw
Miter Saw
***If you don’t have a table or miter saw you might to able to get the cuts made at your local hardware store.***
Steps:
Step 1:
Make all your cuts. If you make all your cuts beforehand it will make this project go faster. Just be sure to measure twice and cut once. Start with ripping your 1×4’s board to 2 1/2 then use the miter saw and cut your 8ft board to 84in and your 6ft board to 53 1/2in.
Step 2:
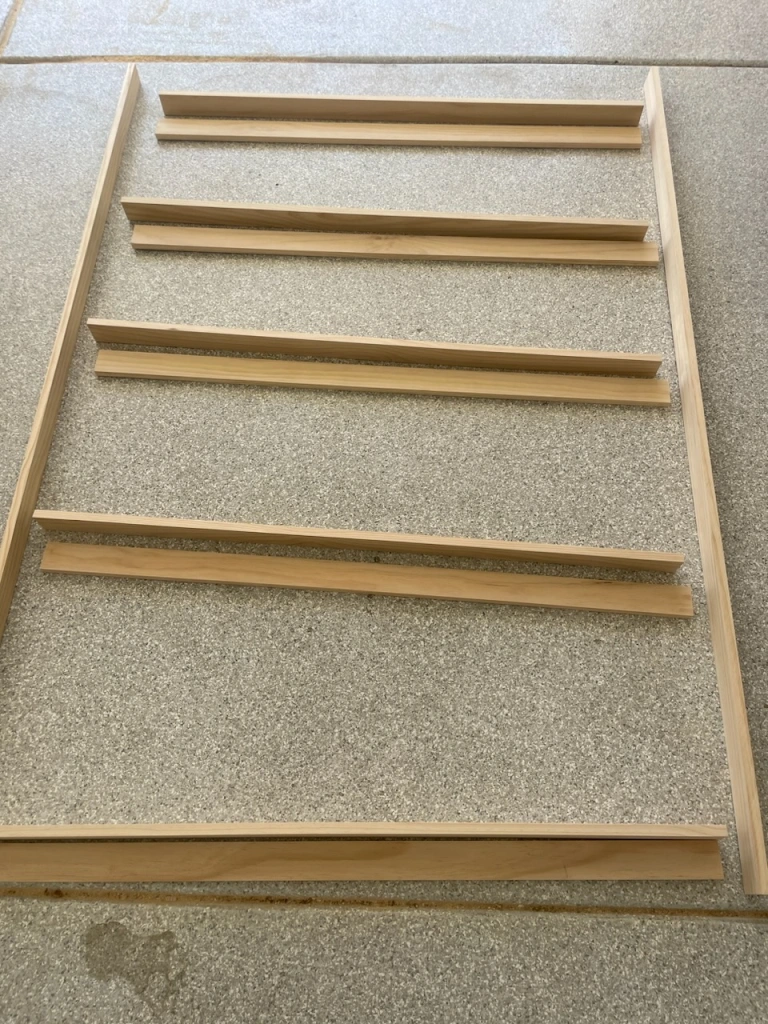
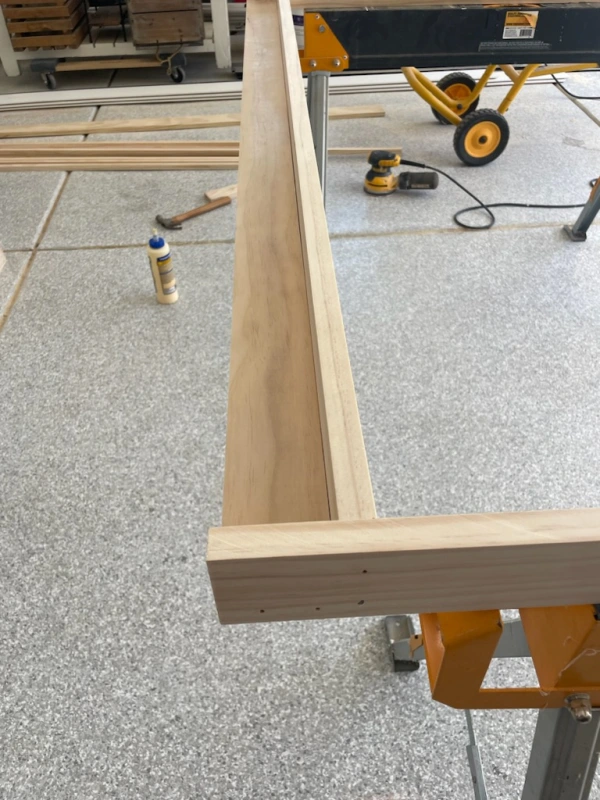
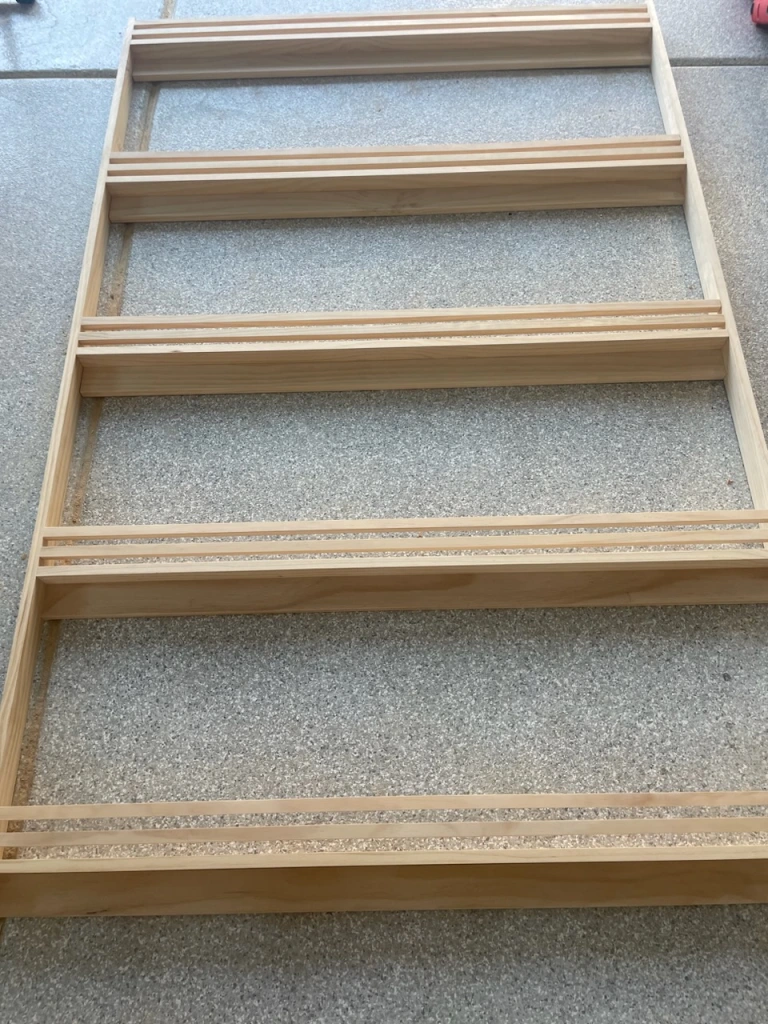
Start with putting your shelves together first. Make sure they are the same length before you start glueing and nailing, in case you need to fit anything. Be sure to glue and nail you shelf top to the bottom piece. You want to nail in about every 6-8 inches. You should have 5 shelves in total.
***I used my side board piece to help support the weight of the top shelf so I can nail it in the bottom shelf piece easier.
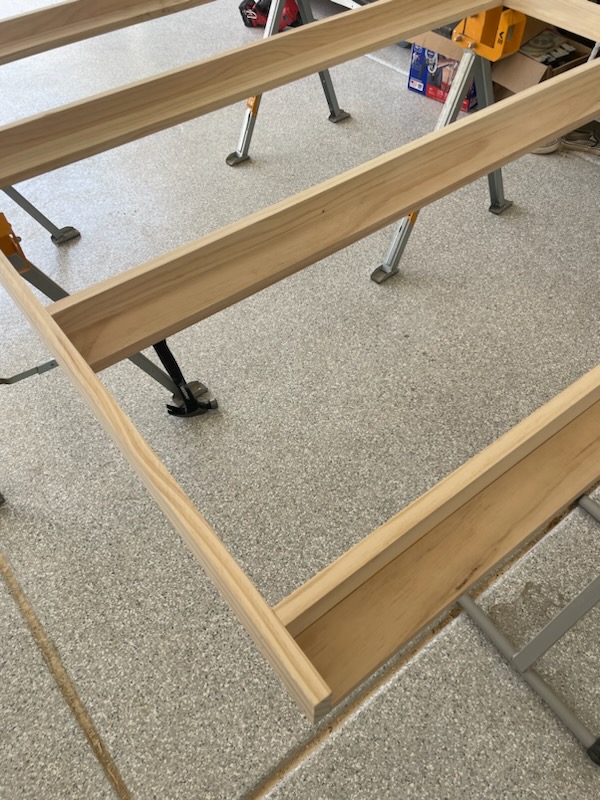
Step 3:
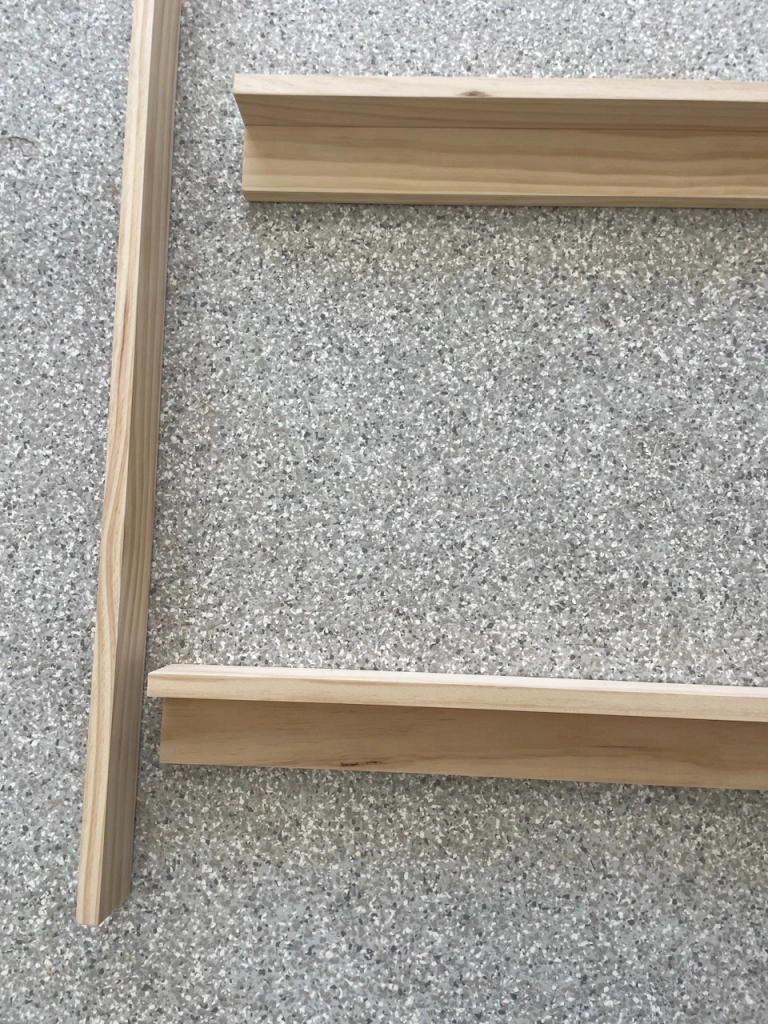
Once your shelves are all done, its time to add the side pieces in. That would be your 84in boards. Start with nailing in the bottom piece first to the sides. Glue and nail. I nailed in 2 nails in the bottom piece of the shelf and 2 nails in the top shelf piece. Once you get this done, move on to the other side. I spaced my shelves 16in apart from each other (from the top of the shelf to the bottom of the next shelf).
Make sure you wipe any excess glue before it dries.
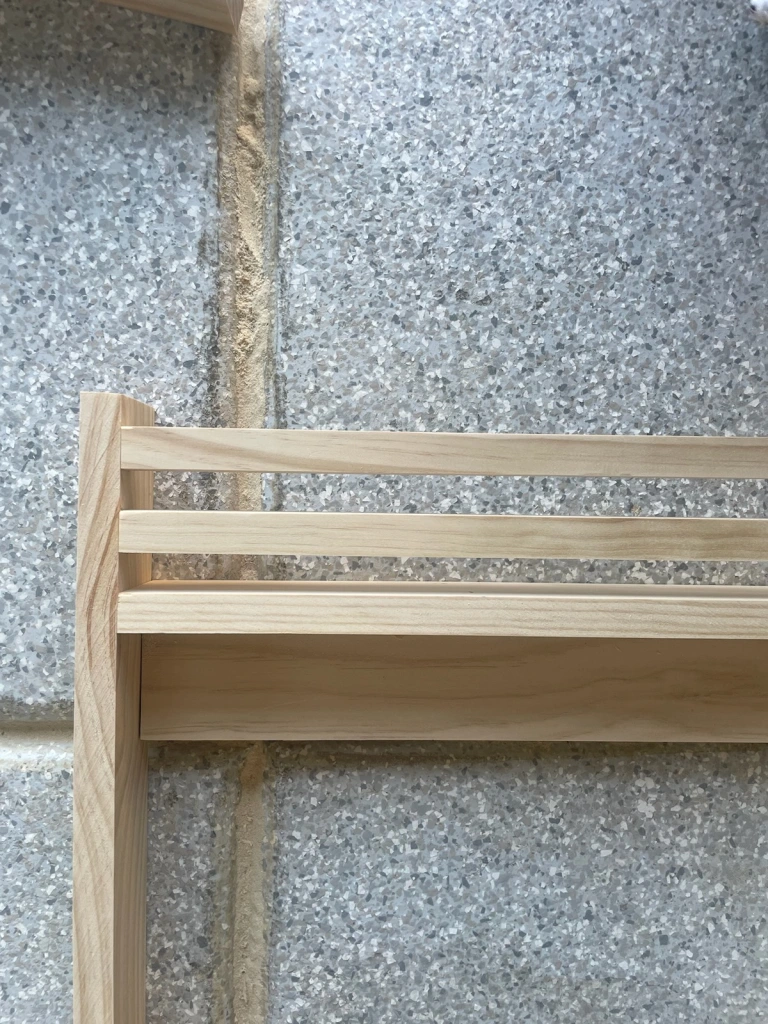
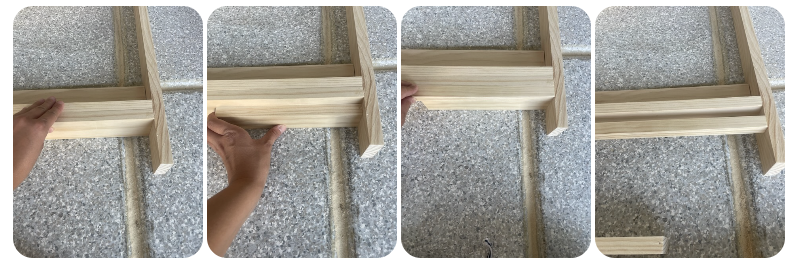
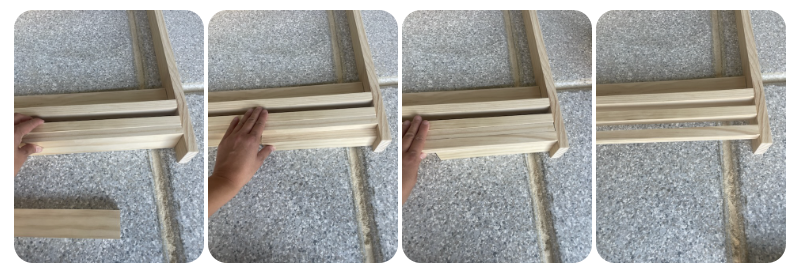
Step 4:
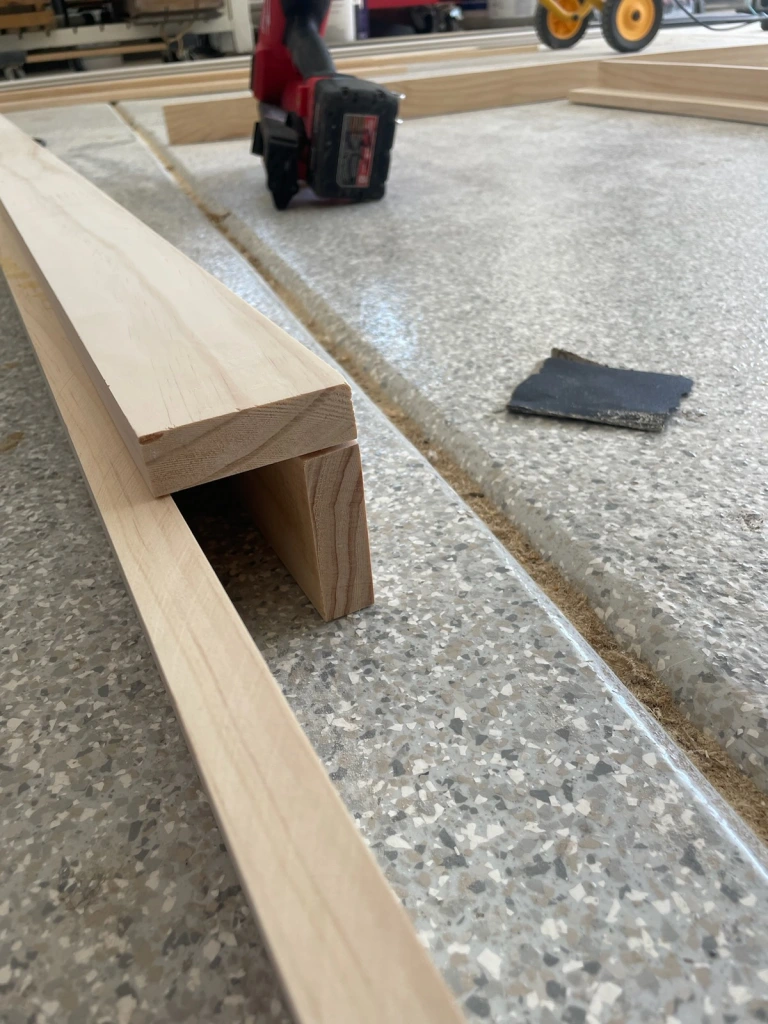
You’re halfway there! Next is the railing pieces. You want to use the extra pieces when you ripped your wood on the table saw. You should have some skinny pieces left. They would be about 3/4in-7/8in thick. You can either leave the pieces as is or trim them down to 3/4in square. I did two railing pieces for each shelf. But you can do one. It’s all personal preference.
Step 5:
Once you have your railing pieces ready. Cut them to length. You have a couple of options here. Either you can add the railing pieces in-between your side boards or have in on top. I chose to do it in between the boards. If you cut them like that, it will be 53 1/2in. If you want them on top of your side boards, it will be 55in pieces. But measure just in case.
Step 6:
Glue and nail your railing pieces to the side boards. At least one nail on each side, if not two. Just be careful.
***I made sure I did a 3/4in gap in between the shelf and the other rail piece. To do this, just use a piece of wood to help with that gap. It will be a lot easier thing to free hand do it. I also cut a piece of wood 1 3/4in to help support to the rail piece to be flesh with my side board.
Step 7:
dYou made it! All that is left is to fill your nail holes, sand your project down and paint or stain.