DIY Projects

DIY Queen Size Bed Frame

"One Day At A Time, One Project At A Time."

Queen Size Bed Frame

How to make a beautiful bed frame for your kids room or guest room!

Items You will need:

Headboard

    • (2) 4×6 @ 55in-headboard legs

    • (1) 2×6 3/4 @ 53in-headboard top middle piece

    • (1) 2×6 3/4 @ 53in-headboard bottom middle piece

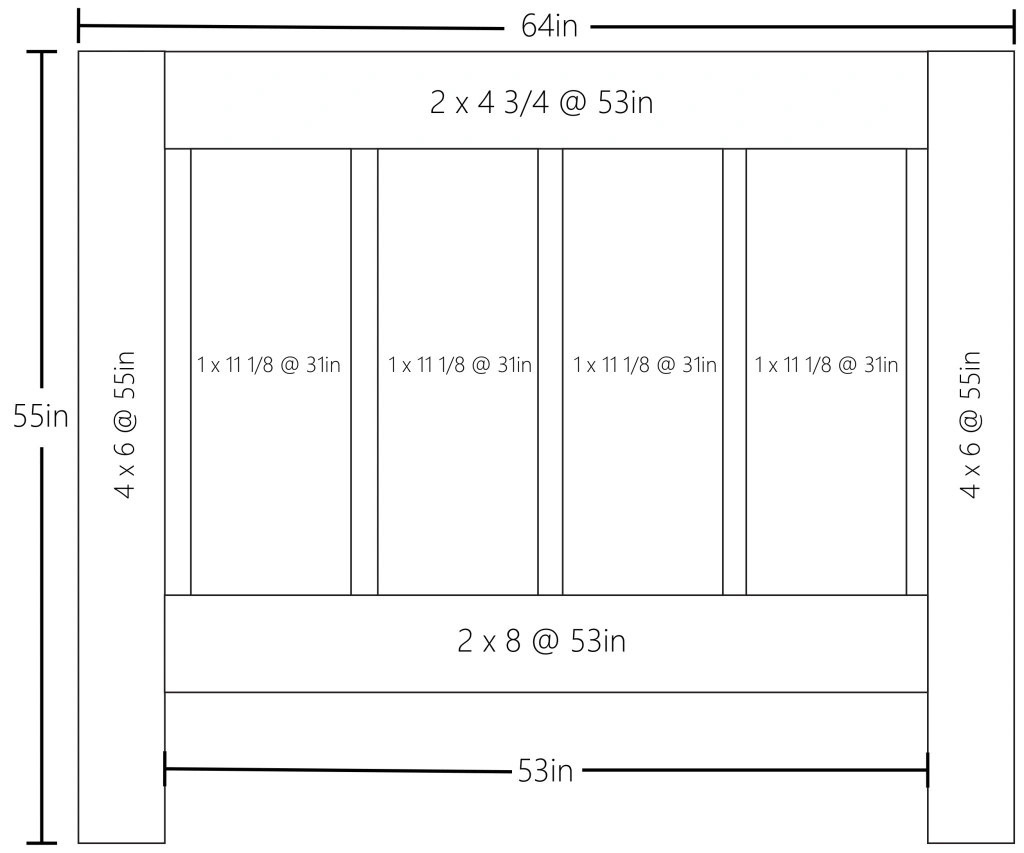
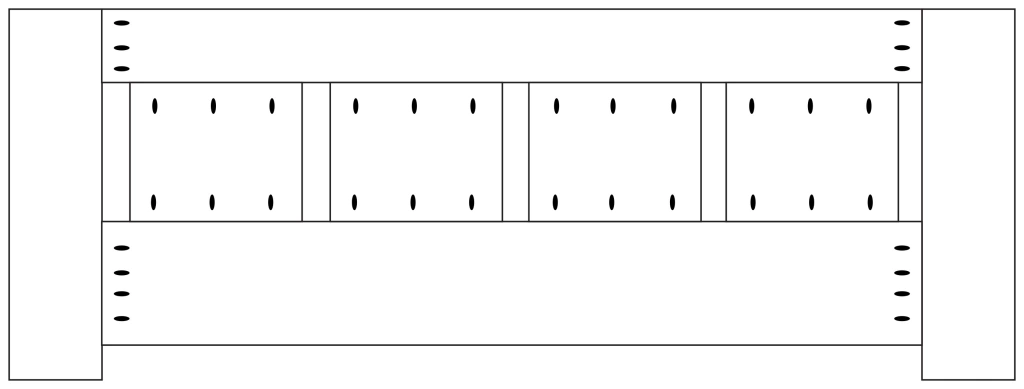
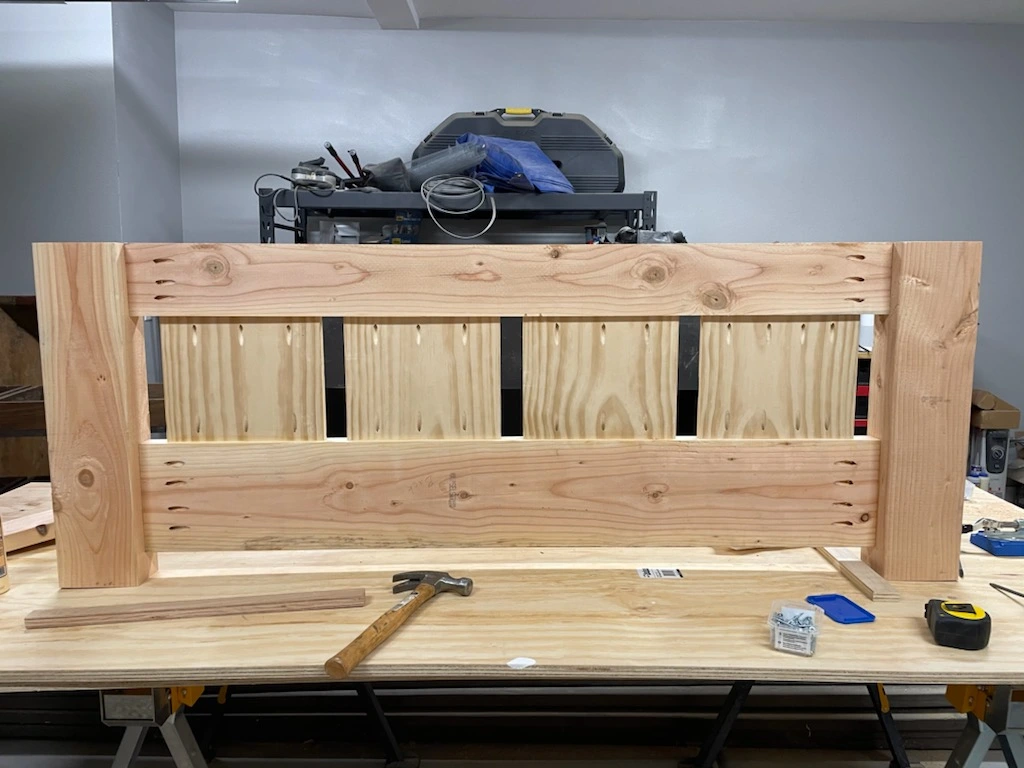
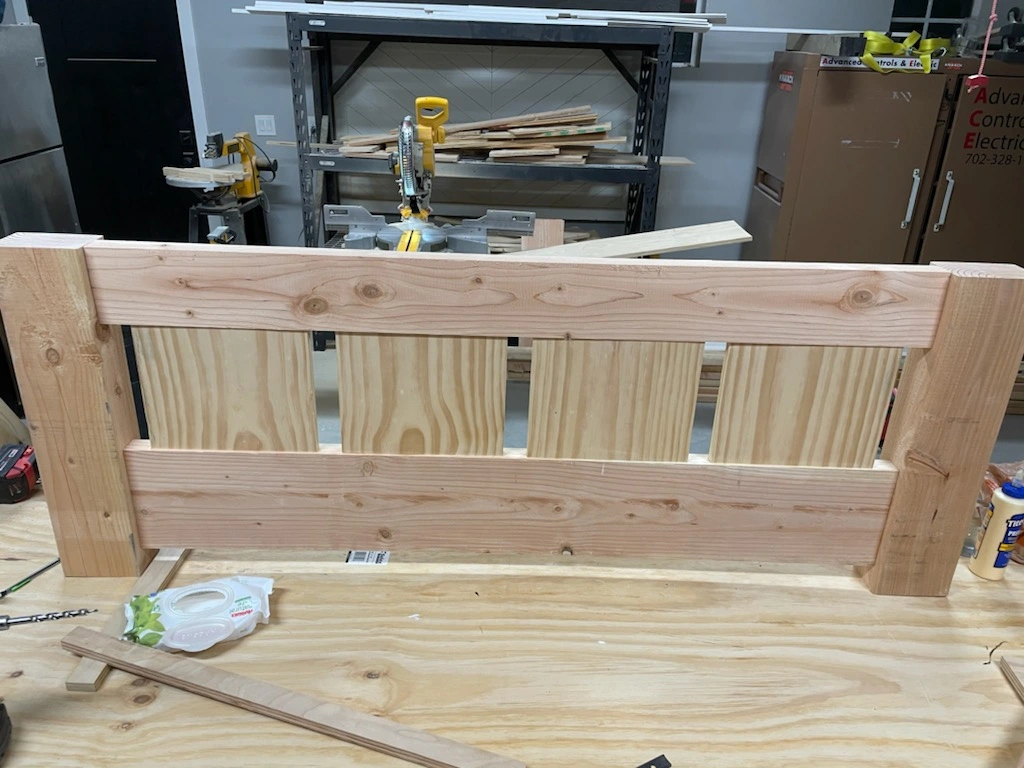
    • (4) 1×11 1/8 @ 31in-headboard middle panels (measure and cut to fit)
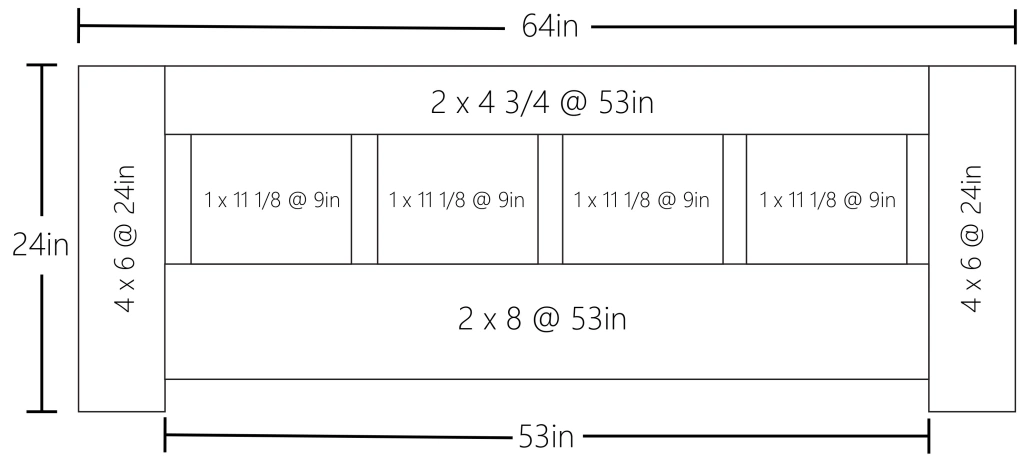
Footboard

    • (2) 4×6 @ 24in-footboard legs

    • (1) 4×4 3/4 @ 53in-footboard top middle piece

    • (1) 2×8 @ 53in-footboard bottom middle piece

    • (4) 1×11 1/8 @ 9in-footboard middle panels (measure and cut to fit)
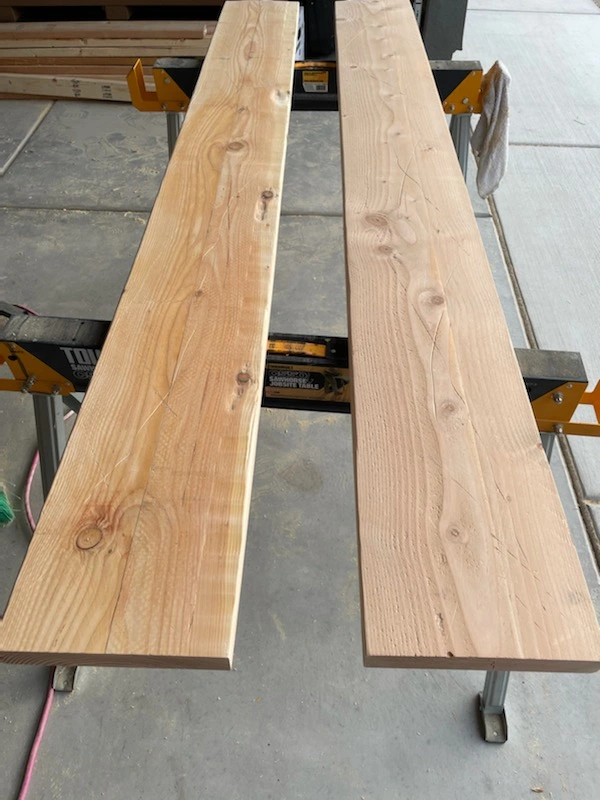
Siderails:

  • (2) 2×10 @ 79in

Tools & Materials:

    • Wood Filler

    • Wood Glue

    • Measuring Tape

    • Electric Sander (optional)

    • 120 or 220 grit Sandpaper

    • Table Saw

    • Circular Saw (optional)

    • Miter Saw

    • Drill

    • 2 1/2in kreg jig screws

    • 1 1/4in kreg jig screws

    • kreg jig R3 kit and clamp

Headboard Step 1-Make your pocket holes on your top and bottom middle pieces using the diagram above on how many pocket holes to make.

Headboard Step 2-Attach your top piece, making it flush on the top of the legs with 2 1/2in kreg jig screws. You want to attach it to the 4in side of the leg so the 6in will be in the front and back.

Headboard Step 3-Attach your bottom piece, measuring from the bottom of the leg 10 1/8 inches up. You can adjust to whatever you like.

Headboard Step 4-Measure and cut your middle panels. Add your pocket holes and attach using 1 1/4in kreg jig screws.

**Be sure to use the wood glue for every piece you nail/screw in together another piece of wood. This helps not only to hold the wood in place better and helps its stay together and keeps your DIY project last longer.

Footboard Step 1-Repeat the same steps as the headboard but using the footboard measurements. When adding the bottom middle piece, we measured 2 1/8 from the bottom of the leg.

Siderails Step 1-Make 4 pocket holes (set at 2 1/2in on you Kreg Jig) on each of your siderails. On the side that would be on the inside of your bed frame.

After your 4 pieces are ready, start sanding and prepping for staining/painting. I used 1 coat of Old Barn Living Nordic Stain and put an extra satin sealer on top of it (3 coats).

You’re going to need at least two people or this next step. We set the headboard and footboard up first (they should both be able to stand by themselves because of the 4×4 legs). Next hold (one person one end at a time) the siderail to whatever height you would like them at. We raised ours about 9 inches off the floor. I would recommend anywhere between 5-8 inches off the floor but it also depends on the depth of your mattress. Attach the siderail using your kreg jig 2 1/2in screws. Then repeat for the other ends of each siderail.

Your bed frame is all done. Now you can can move your adjustable base and mattress inside or you can add you slats inside of the frame to support your mattress.

***For slats, measure the inside of the frame and cut (4) 2×4’s with 2 pocket holes on each end. Attach using 1 1/2in kreg jig screws. For extra support or if your not using a box spring add a piece of 3/4 plywood on top of your slats.