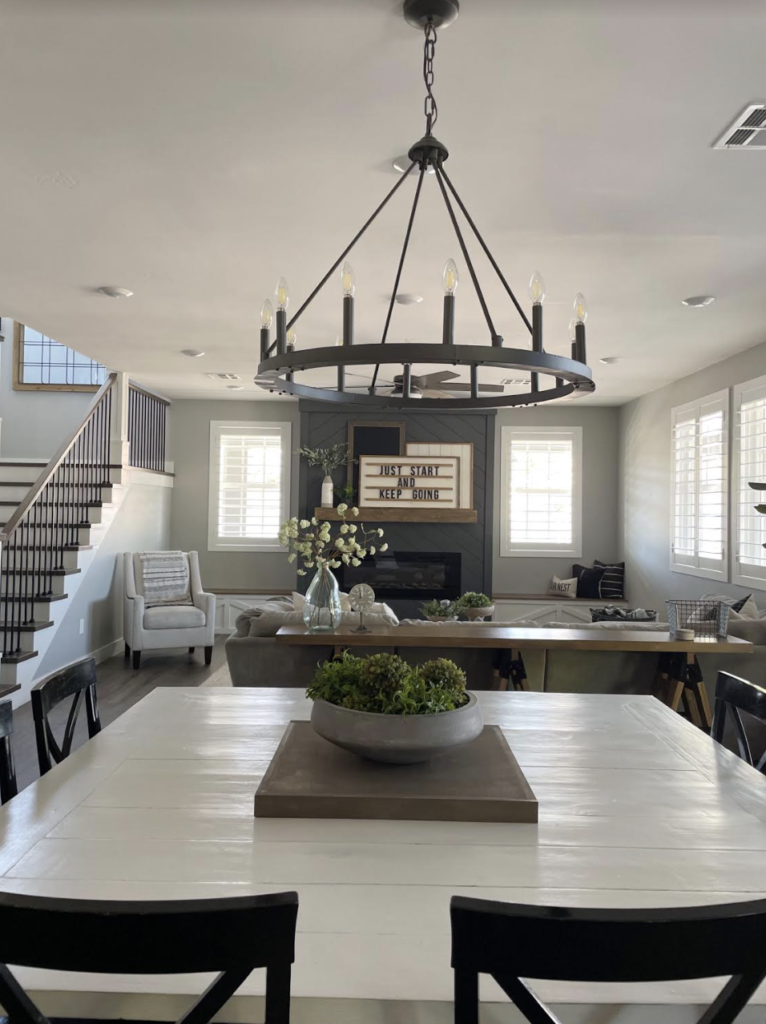
How to add a sofa table that fits your space perfectly!
Items you will need:
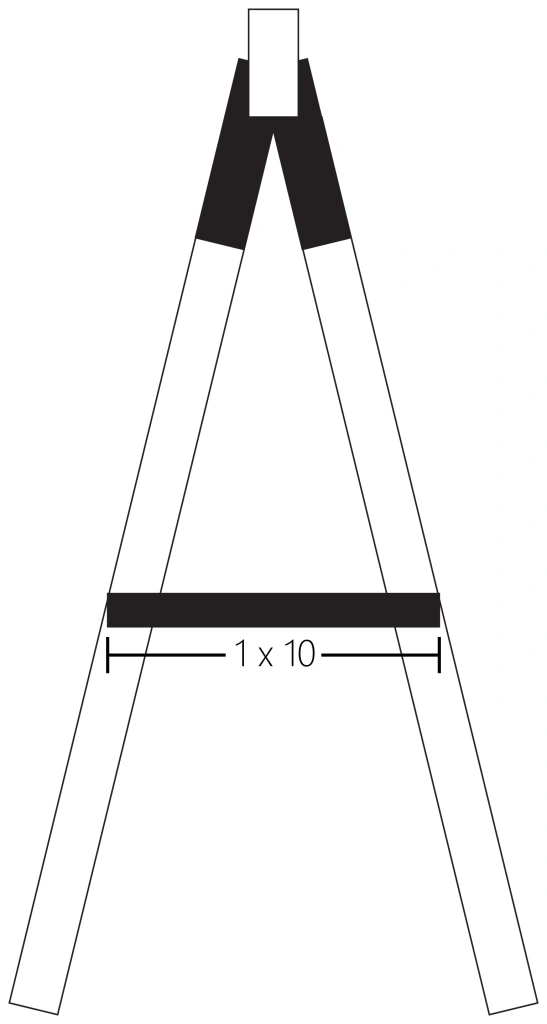
(12) 2×4 @ 27 1/2in
(3) 2×4 @ 12in
(12) 1×2 pine board @ 5 1/4in-measure and cut to fit
(3) 1×2 3/4 pine board @ 96 in-measure and cut to fit
(1) 1/2 plywood cut @ 12x96in
(2) 1×2 poplar wood cut @ 96in-measure and cut to fit
(2) 1×2 poplar wood cut @ 13 1/2in-measure and cut to fit
(3) sets of sawhorse galvanized brackets
(1) 1×72 metal flat bar 1/8″ thickness. (6) cuts at 10in
**Overall the table is 31 1/2in high x 13 1/2in wide x 97 1/2in long. If you want your table taller or shorter, add or subtract from the legs. If you want the table closer to a 6ft long table, measure and cut the top of the table to your desired length and only do two sawhorse legs.
Tools & Materials:
Wood Filler (optional)
Wood Glue
Electric Sander (optional)
Spray Paint
Stain/Paint
120 or 220 grit Sandpaper
Table Saw
Miter Saw
Finish Nail Gun
1in Finish Nails
1 1/4 Finish Nails
Kreg Jig Tool
Drill
1 5/8in Wood Screws
1 1/4in Kreg Jig Screws
Pocket Hole Plugs (optional)
Band Saw or Grinder (optional)
Metal Drill Bits
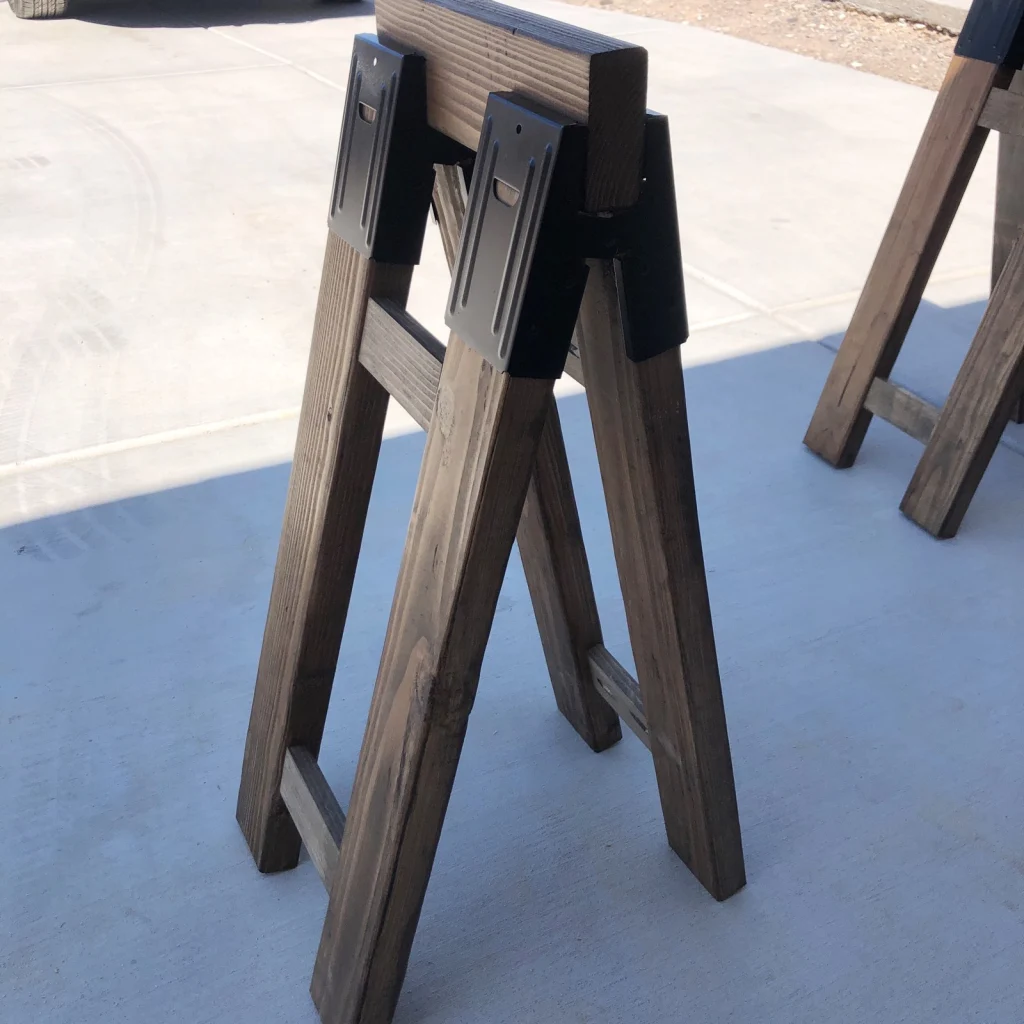
Step 1-If you’re going to spray paint your sawhorse brackets, do this first so they can dry completely for 24 hours.
Step 2-Add pocket holes to your 1×2 @ 5 1/4in pieces (like photo above). Get your two legs (27 1/2in pieces) and screw together (like photo above). Be sure to use wood glue and kreg jig screws. I would recommend painting/staining the legs right now. It will be easier. As well as the 2×4 @ 12in pieces.
Step 3-Place legs in brackets and set your 2×4 @ 12in piece on top of the legs. Make sure your legs are spread apart as far as they can spread. Secure legs with wood screws through the holes on the brackets.
Step 4-Spread your three sets of legs to where you want them. I put my two outer legs 11 inches in from the top and centered my middle leg in between them. Place your three wood strips on top and screw down to the top piece of your legs with your wood screws. Make sure everything is nice and square.
Step 5-Add wood glue on top of the three wood strips. Place you plywood top on top of the wood strips. Square it up and finish nail (1 inch) to the wood strips. Start with the corners and work you way to the inner sides and then the middle last. That’s the easiest way to do it.
Step6-Trim your plywood with your poplar trim pieces with 1 1/4 finish nails and wood glue. Start with the longer pieces. Making sure its flush with the end of the plywood. Then do your smaller side trim pieces
Step 7-Lastly, add pilot holes to both sides of your metal flat bar pieces and paint. Let dry. Place metal flat bars to your legs with wood screws. Now paint over the screws heads and paint/stain your table top.