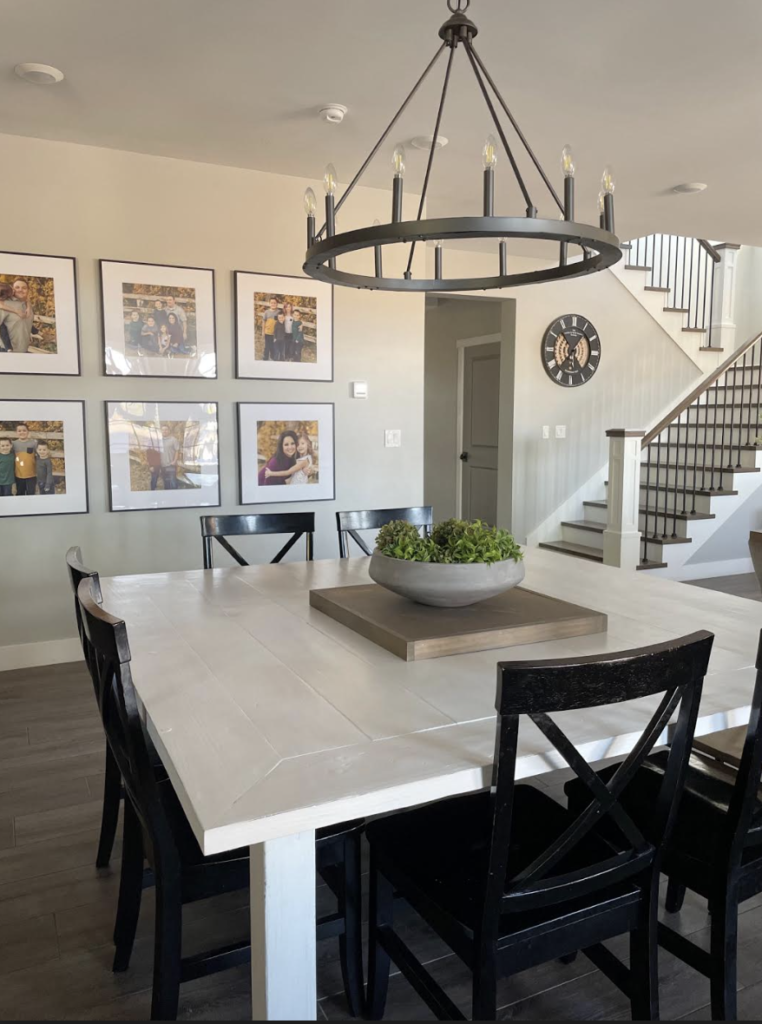
How to make a dinning room table that has room for all your friends and family? This is the one, learn to build it here!
Items you’ll need:
(13) 2x6x6ft
(2) 4x4x6ft
(7) 2x4x6ft
Tools & Materials
Wood Glue
Kreg Jig & Clamp
Kreg Jig Plugs
2 1/2in Kreg Jig Screws
220 grit Sandpaper
Painters White Caulk
Table Saw
Miter Saw
Level
***This is for a 6ft square table. If you do a 5ft table buy the same materials. If you do a 7ft tabl
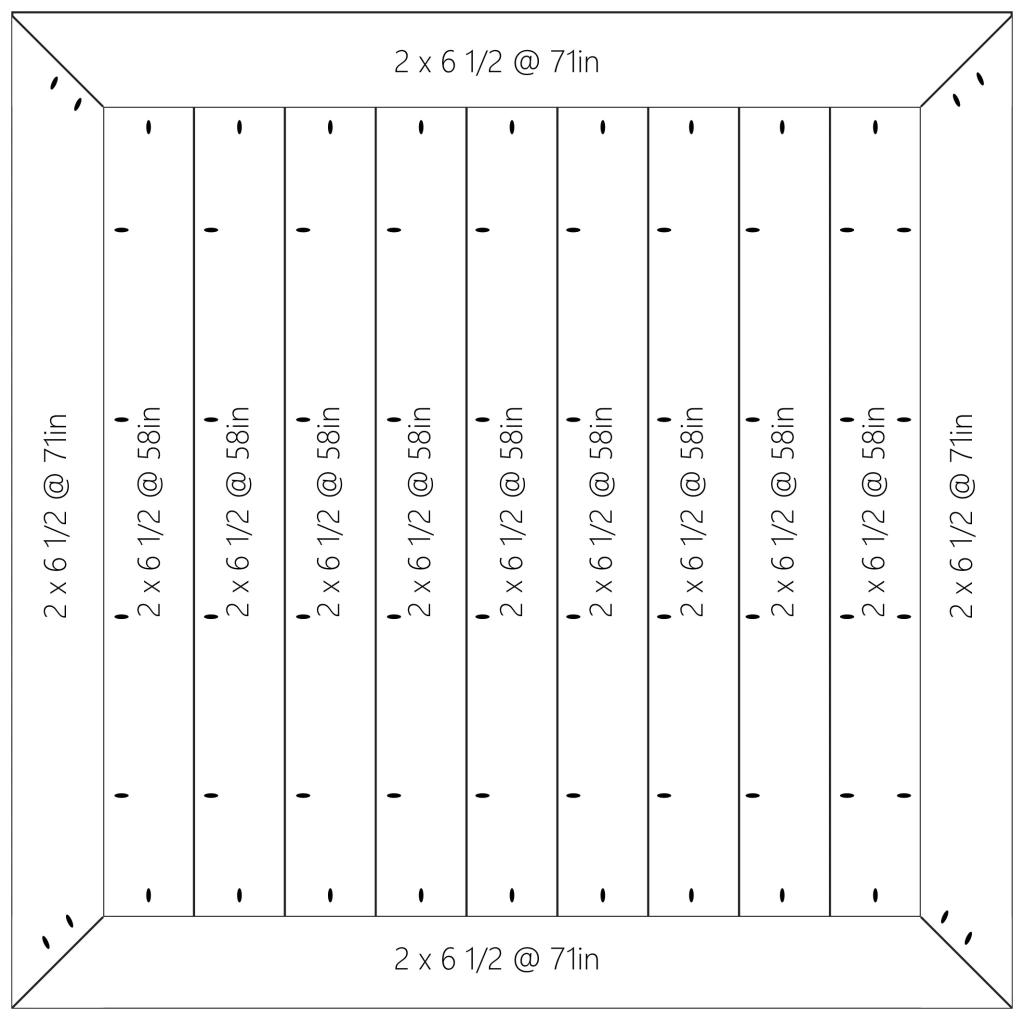
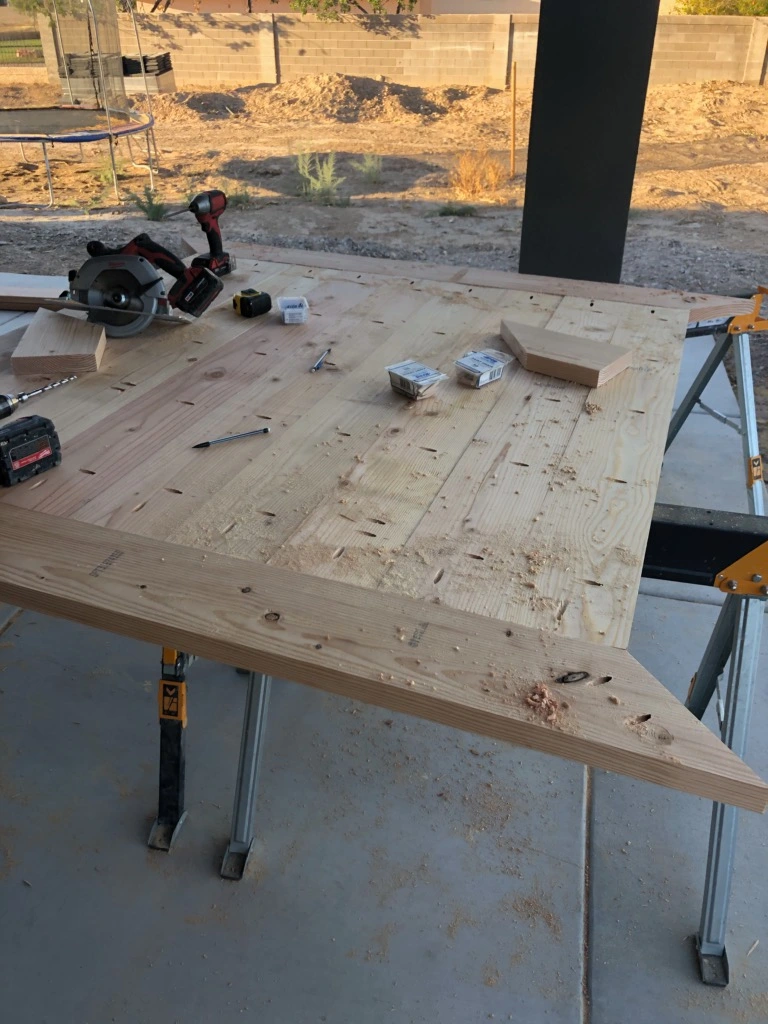
Step 1-Start with cutting 9 of the 2×6’s at 58in. To get rid of the rounded edges use a table saw to trim the 2×6 length. Making them 6 1/2in wide boards. Using your kreg jig, drill 4 evenly spaced pocket holes on the bottom side (the part that will be underneath the top of the table) on one side of each piece of wood that was cut and 1 pocket hole and each end (Follow the picture above to reference). On one piece of wood drill an additional 4 pocket holes on the opposite side of the board. Making that board have 10 pocket holes. The remaining 8 boards should have 6 pocket holes on it. Use wood glue and screws and attach all 9 pieces together.
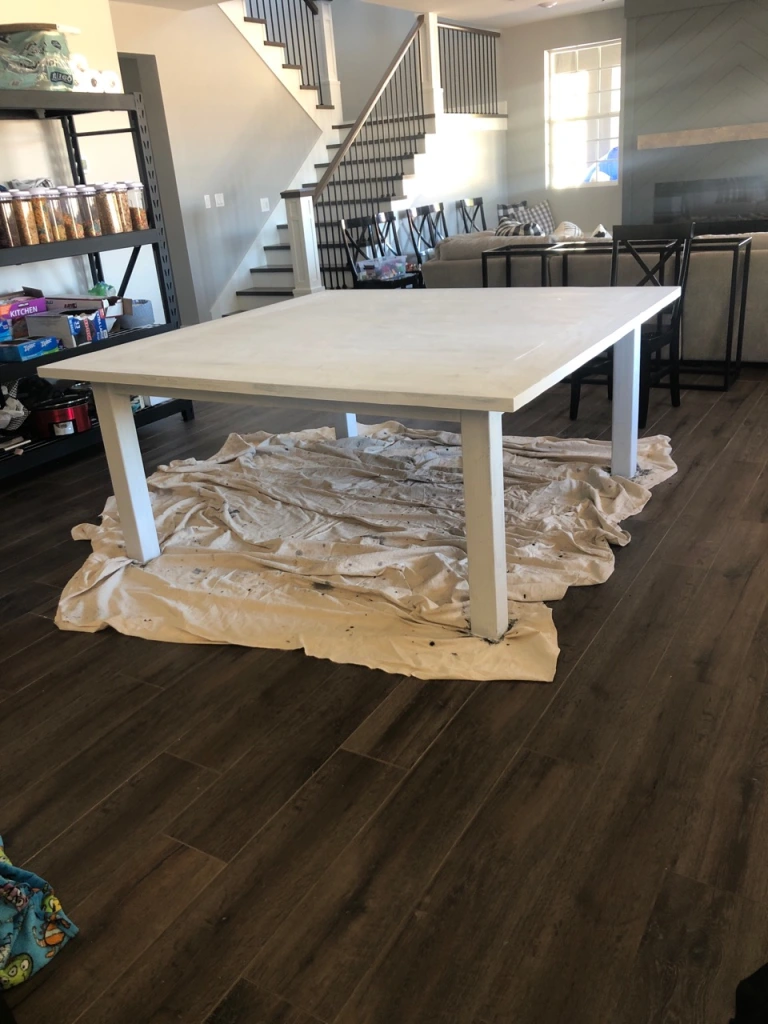
Step 2-Now trim the remaining 4 2×6’s at 6 1/2in wide. Cut at about 71in.Cutting both ends at an angle to attach all four pieces around the middle piece. Make two pocket holes on both ends of two of the boards. Attach the two boards, with wood glue and kreg jig screws from the middle pieces. Then attach the those boards (that don’t have any pocket holes) from the ends first then the middle. Everything should be snug and tighten. The top will be really heavy. You can sand down the top of the table at this point
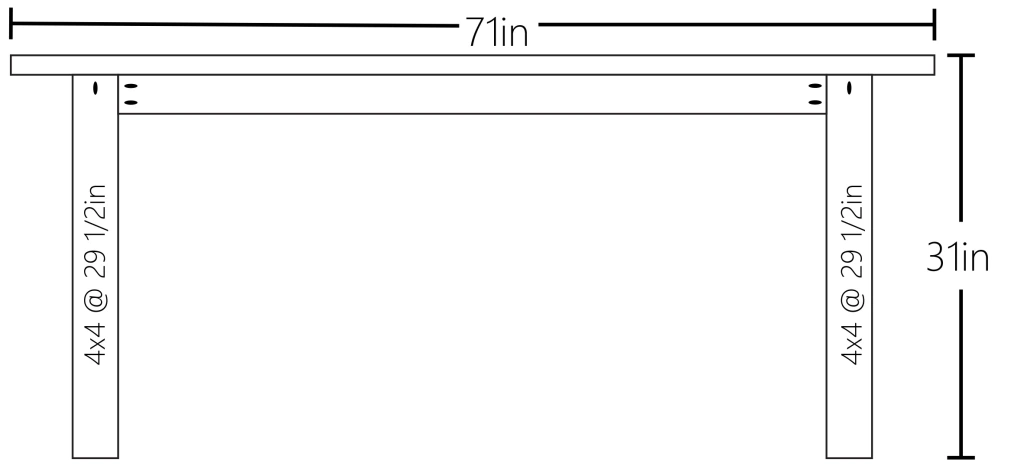
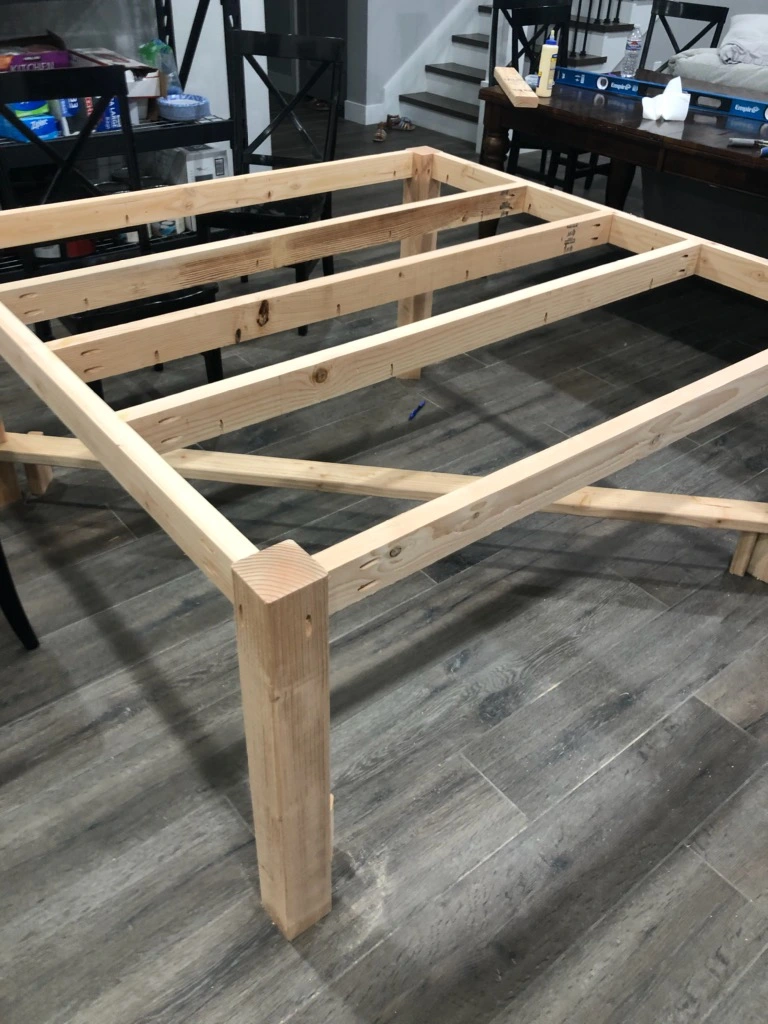
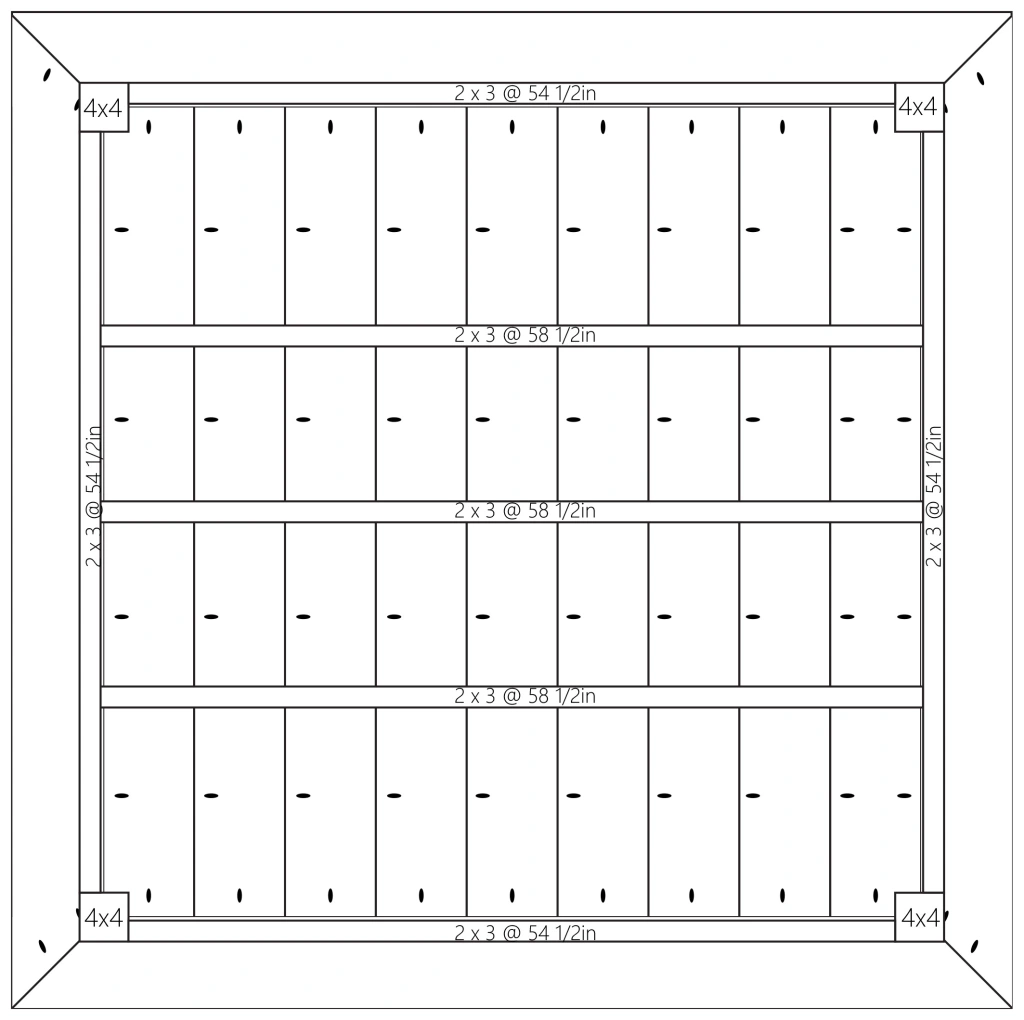
Step 3-Cut your 4×4 at 29 1/2in. You should have 4 (the legs of the table) pieces. Make a pocket hole on each side on one end. Two sides (the outer sides of the leg), make the pocket holes in the middle of the side and the other sides (the inner sides of the leg) make the pocket holes closer to the inside of the table.(refer to pictures)
Step 4-Cut four 2×4’s at 54 1/2in and then trim to 3 in wide, to get rid of the rounded edges. Make two pocket holes on each end of the 2×4’s. Attach each 2×4 (now 2×3) to each leg using glue and kreg jig screws. Facing the side with pocket holes on the outside and making in flush on the side on the 4×4 with the pocket hole on the inner side of the table.
Step 5-Cut the last three 2×4’s at 58 1/2in and then trim to 3 in wide. Make 2 pockets holes on each end and 4 spaced evenly on one side (follow picture below). Attach the three pieces between the frame of the base spaced evenly.
Step 6-Center your top on the base frame. It should be about 4 3/4in from each side to the legs. and attach from the 3 middle braces and the inner pocket holes on the each leg. Cover the pocket holes that are visible on the outside with kreg jig plugs, using wood glue.