DIY Projects
HOW TO EPOXY YOUR GARAGE FLOORS
"ONE DAY AT A TIME, ONE PROJECT AT A TIME!"
Garage Floors
So you want to epoxy your garage floors? This was my first time doing it. I will just say right off the bat, that it is a lot of work and time with prepping your floors. The actual epoxy isn’t bad at all. But it’s very important that you don’t skip the prepping step(s). I talked to several concrete guys personally and they all said the same thing. It’s all about how you prep the concrete and it’s the most important step when it comes to epoxying the floors. If you don’t do any prepping, the epoxy won’t last very long on the concrete.
After talking with multiple concrete guys, this is what I did to prep and epoxy my floors. Some of the steps are pretty simple and self-explanatory but I’ll still walk through the whole process.
Step 1: Cleaer
First step is to clear your garage. If this is a new construction, it will be a lot easier to clean but I’m sure you have some stuff sitting in your garage. If not, then I’m sure this will be a great opportunity for you to get rid of stuff and once your floors are done you can organize a little bit. Either way, you want nothing on your floors at all.
Step 2: Sweep
You can to get rid of as much dust, dirt and trash as you can. I sweep up the majority of the dust and dirt. Then I got a leaf blower and blew out as much dust as I could. Just start in one corner of the garage and work your way to the other side and corner.
Step 3: Grind
This step is somewhat optional. If you have any residue, or paint, or stain, oil spills, whatever, then grind your floors. If it’s brand new concrete, first wait about a month to prep and epoxy your floors, second you really don’t have to do this step. But if you want to be on the safe side or if you’re an over-achiever, like me, then do it. It’s not going to hurt anything. But I will say, it is a back breaker. I had to do my garage in sections within 3 days because my lower back would be toast after a while. But that’s because I used a hand held grinder. I think you can rent a grinder from Home Depot or Lowes that stand’s up. You want to take that smooth finish off the concrete and rough it up a little. Especially where you have any stains on the floor from whatever.
Step 4: Water
After step 3 or 4, I sprayed out my garage with water. Just be careful to not get your drywall wet on the wall. This will help get rid of any extra little dust.
Step 5: Patch
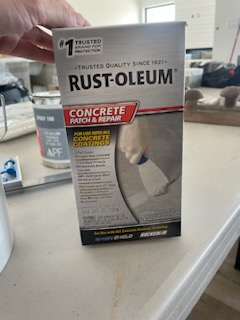
You want to make sure your floors are completely dry when you do this step. This step is also optional. If you have some cracks that need to be filled, you can patch them. Yes the epoxy will fill it in but this will just help it take that step further. I did ask my concrete about this, and he did warn me that no one matter what I do, there could be a chance that it be wear off and crack again in the future. That’s with the patch or without it. Only time will tell. Let the patch repair stuff dry overnight before the next step.
Step 6: Etch
This is a definite must step. If you don’t grind your floors, then you’re going to want to do this step for sure. Etching the floors will help remove more dirt and it will also help rough up the concrete top layer. I used this product from Lowes. Use a hard bristle broom and scrub the floors with the etch. Be sure to have your water hose on hand because you don’t want the etching product to dry on the concrete. And you’re going to want to water your garage out a few times to get any of the chemicals off the floor completely.
Step 7: Mop
This is going to be a weird step and I wasn’t even planning on doing this step until my concrete guy mentioned it. He recommend mop the floors with straight Ammonia. I have to say that I have never used Ammonia and that stuff will clear your nostrils. It’s pretty intense. Be sure to do this step either with a respiratory mask and/or with your garage door(s) open. This step will clear and clean any extra dust and chemicals from the etching. Let dry completely or overnight before you start epoxying the floors.
Step 8: Vacuum
I vacuumed any excess dust and dirt in the joints of the concrete and all the edges and corners. I thought I wouldn’t have to do this because of all the cleaning before but I actually had quite a bit of dirt stuck in the joints.
Step 9: Prime
Priming the floors was also another step I wasn’t planning on doing. I was recommended by Concrete Accessories (where I bought my prime, epoxy, flakes and sealer and brushes from). Like I said before I wanted to do anything I could do to prep my floors and have the epoxy last as long as possible. Basically this is a clear epoxy and this will help your epoxy bond a lot better to the floor and last longer. Be sure to have your garage doors completely open while priming, epoxying and sealing, for ventilation purposes. Apply one coat of this on your floors and let it dry overnight. I had my garage doors cracked a little to help dry and so it wouldn’t get stuck on my weatherstrip on my garage doors.
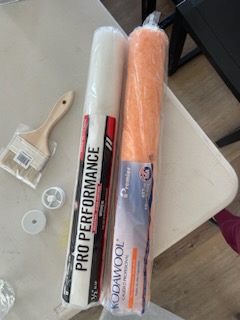
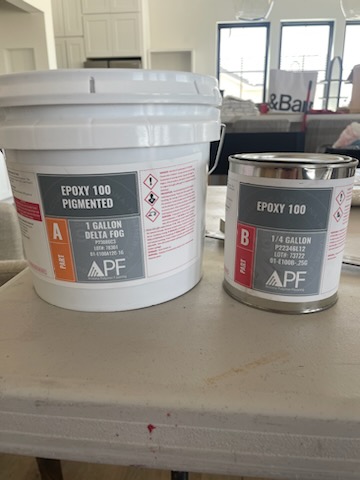
I did this by using a paint brush roller and a hand brush for the edges and joints. A 5 gallon bucket will come in handy to mix your prime, epoxy and sealer. I learned from this step, that it is way better to roll and do the cracks and edges one square at a time. Don’t roll and then brush everything. You’re primer will harden so you want to work quickly and efficiently. Having a buddy will make it go faster and easier. One person rolls and one person brushes. But you don’t need two people. I did it myself. I used a water base 2 part epoxy for the primer, epoxy and sealer. I also recommend wearing disposable gloves. Otherwise it will feel like super glue on your skin.
Step 10: Epoxy & Flakes
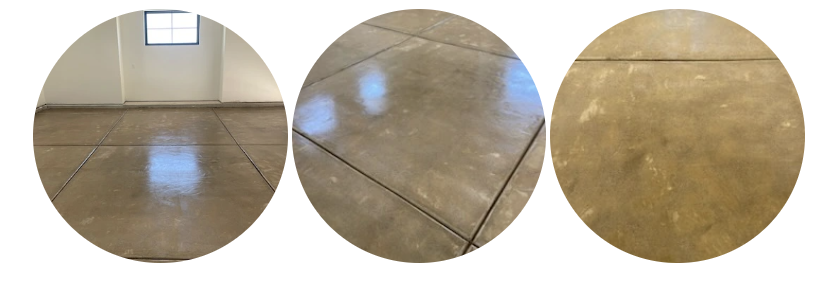
We finally made it to the main event. If you primed the floors then this step will be exactly like that but you’re adding the flakes as well to it. I had my husband help me with this step because it’s a lot easier, faster, and I didn’t want to worry about the epoxy drying up. You are going to want to epoxy one square or section at a time and sprinkle the flakes immediately after. Because the epoxy starts to dry and cure pretty fast. If you put the flakes on fast, they will grab onto the epoxy easier. Depending on the look you want for the flakes, you can go as little or as full coverage as you want. I originally was planning on doing a medium coverage but every concrete guy I talked too said that full coverage was the one and only way to go. So I took their advice and did full coverage and I’m so glad I did. You want to literally cover your epoxy with the flakes. Again, Let this dry overnight.

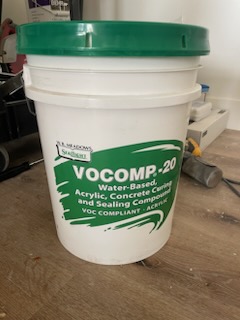
Step 11: Seal (round 1)
Before you start sealing, I strongly recommend getting a leaf blower and blowing any excess flakes in a corner and then sweep up and you can reuse them for the last step. Do not strap any of the flakes that are sticking up otherwise it will breeak down the flakes too much.
I used this product called Vocomp-20. I was also recommended to use this product from Concrete Accessories. You can totally skip this step as well. They told me that this is a sealing but it will also help the flakes come more together and almost look melted together, instead of them sticking up. Apply one coat of this with a roller and brush. Let it dry overnight.
Step 11: Seal (round 2)
Last and final step, the main sealer will be applied just like the primer and epoxy. You want to apply one thick coat and that’s it. It you have any bald spots or spots that need a little extra flakes this is where you would add them in. What I did was apply a coat of sealer, sprinkle on the flakes and apply a coat over that. I did this so the flakes have something to grip too. It’s ok if some come off and roll on the roller. It will roll on top of the epoxy eventually.
I would recommend to definitely seal it at least once. This help protect the epoxy, last longer, and so the flakes don’t fell rough on your feet. It will also give that glossy look and it will be so much easier to clean your garage. I’ve already dripped some paint and stain on it and it was so easy to clean up. Wait for about 24 hours to walk on it, 48-72 hours to move stuff back in the garage, and 1 week to drive on it.
All in all, epoxying the floor isn’t hard to do. Anyone can do it. You can save at least half the cost by doing it yourself. It is a little time consuming but if you do it right, it will be worth it. And honestly you will probably do a better job than the other guy you were going to hire. Hopefully you learned one thing from me.