DIY Projects
How to Hang a Porch Swing
"ONE DAY AT A TIME, ONE PROJECT AT A TIME!"
How to Hang a Porch Swing
Items you will need:
- (4) 5 gallon Paint Buckets (I used Home Depot ones)
- 1 inch x 5ft Natural Twist Rope (for 10ft ceiling heights)
- (4) Stainless Steel Carabiners
- (4) 5/8in Galvanized Cable Clamps
- (4) 1/2in Galvanized Cable Clamps
- (4) 1/2in Galvanized Anchor Shackles
- (4) Boxing Bag Hanger Brackets or Galvanized Swing Hangers
Tools you will need:
- Socket Wretch
- Drill
- Measuring Tape
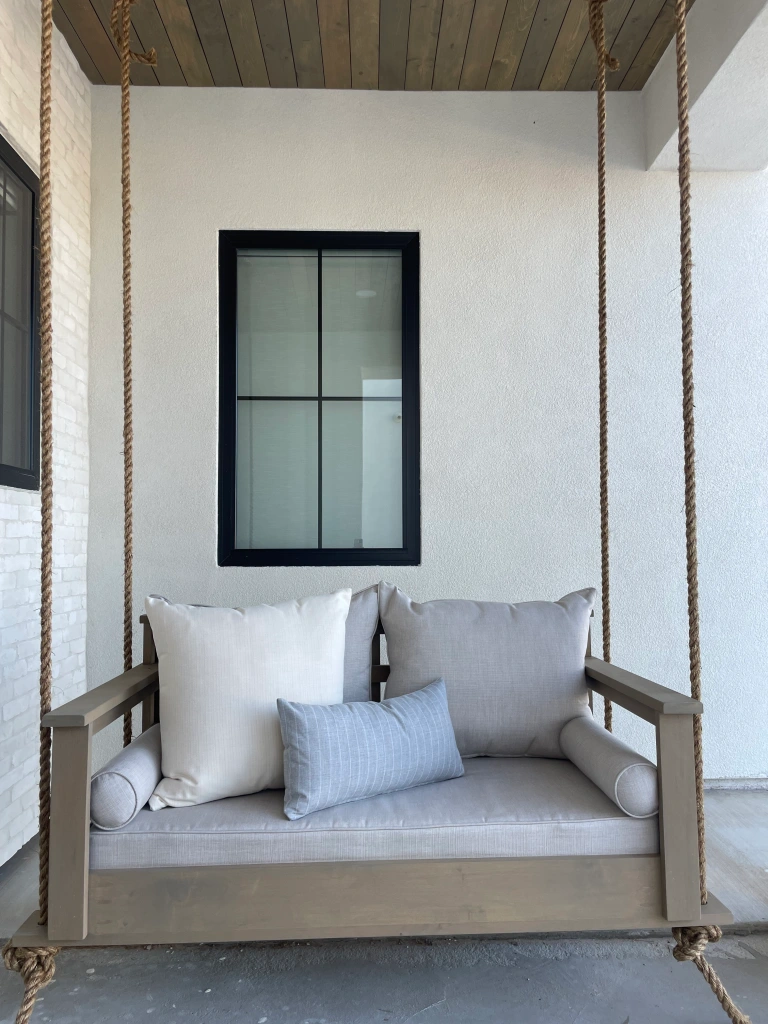
Step 1 & 2:
Step 1-You want to install your hangers in first. We used the boxing bag hanger brackets. But this needs to be done before you install your porch ceilings. So if your ceilings are already done then use the galvanized swing hangers.
Measure the width of your swing and you want to place the hangers in the dimension of the swing just on the ceiling.
Step 2-Next add your anchor shackles on the swing hangers. You may need to add a carabiner in if the shackle is too big for your swing hangers. Or sometimes the swing hangers maybe include a carabiner.
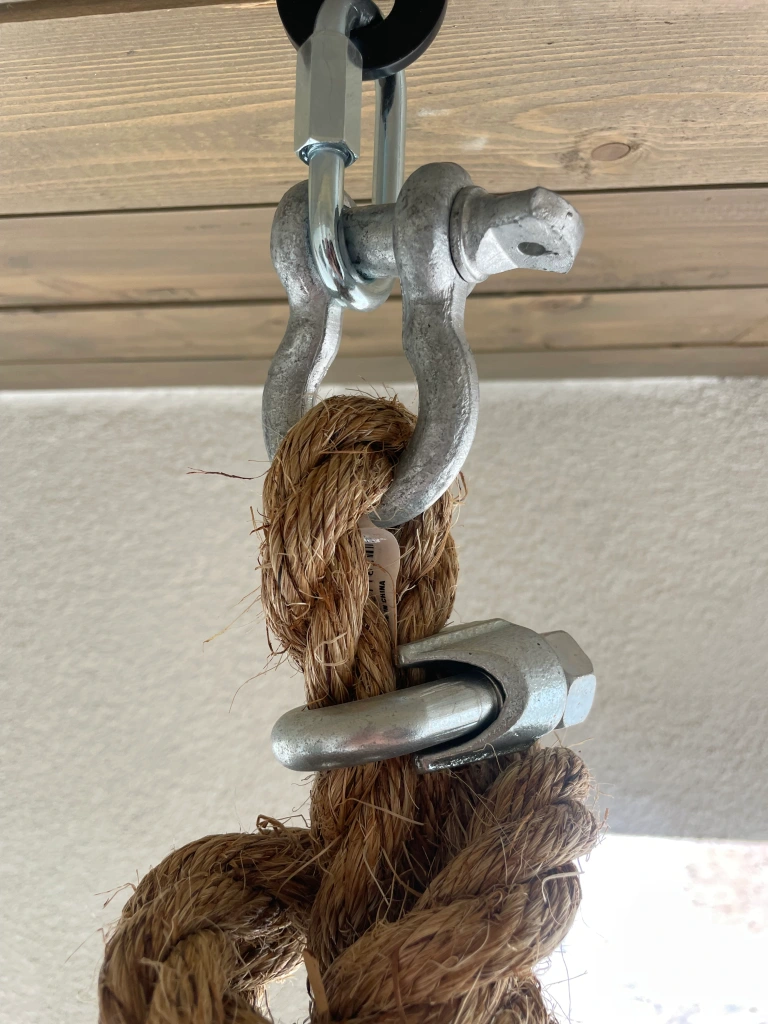
Step 3:
You can add your rope in now through each shackle. I cut about 12ft of rope for each side. But do 13ft if you want that extra just in case.
Next I tied an Ashley Stopper or Oysterman’s Stopper Knot. I used this tutorial I found on YouTube to help me. I tied the knot with about a foot of extra rope hanging. I will say it will be a little hard to tie the knot but it’s doable.
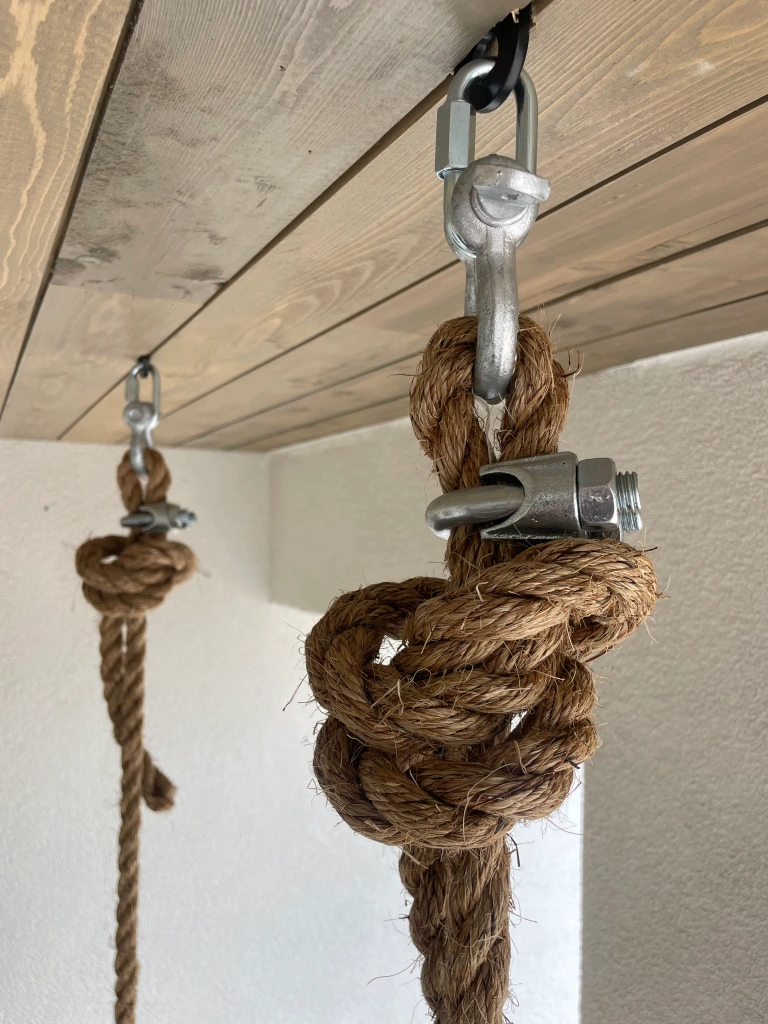
Step 4, 5 & 6:
Step 4-Once the knot is tied, use your 5/8in galvanized cable clamp in between the knot and shackle. This will help secure the the rope from moving or unknotting. You want to make sure you tighten the clamp as tight as you can usually your socket wretch.
Step 5-Now to work on the bottom half. You want to place your 5 gallon buckets to hold the swing in place. This also will help for your swing to be a perfect comfortable chair heigh as well.
Step 6-Once your swing is in place, put your rope through the 1 inch hole on the sides of your swing and tie another Ashley Stopper or Oysterman’s Stopper Knot.
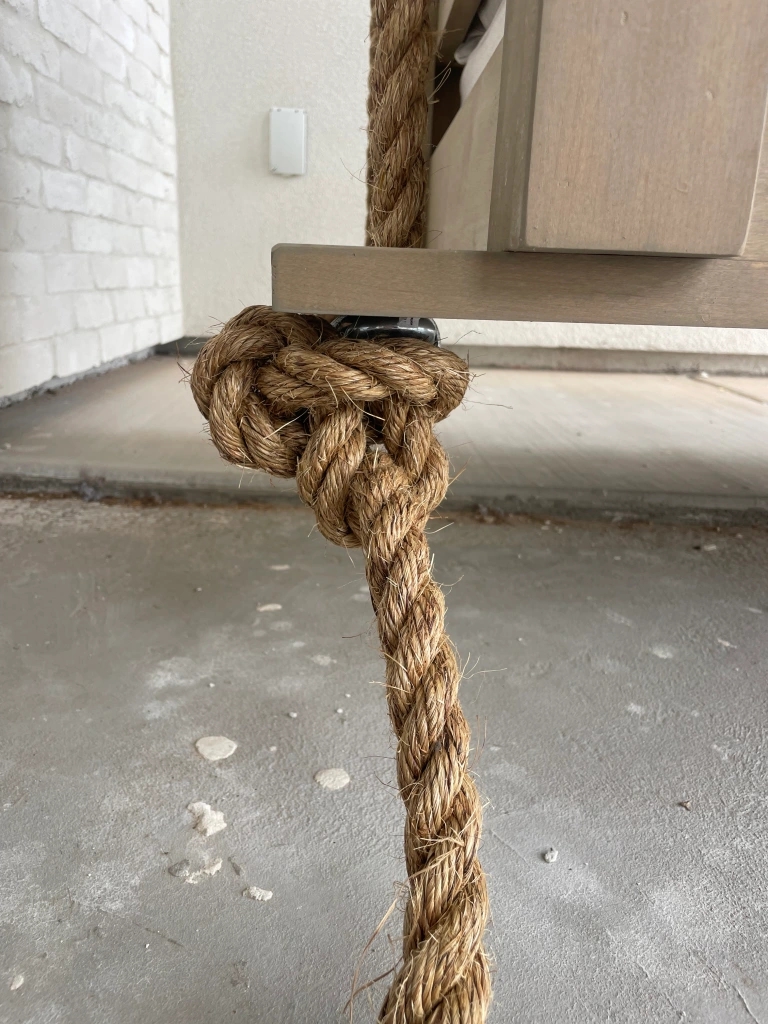
Step 7:
Secure you rope with your 1/2in galvanized cable clamp in between the knot and the wood on the swing. Tighten this as much as you can with the socket wretch again.
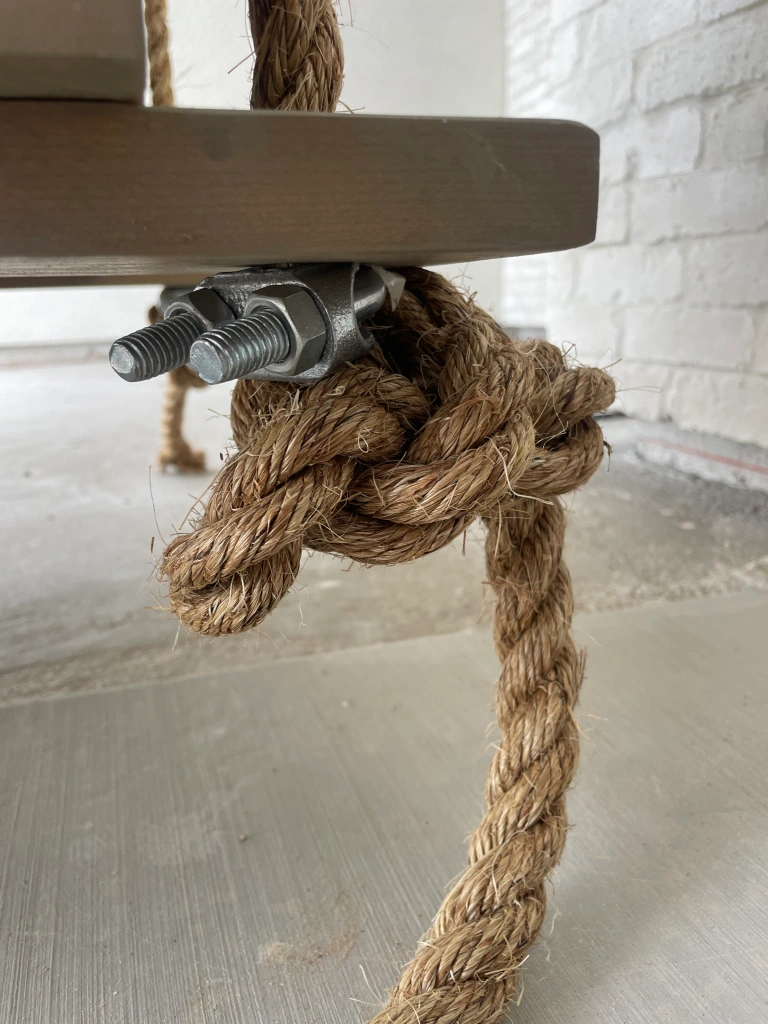
Step 8:
Everything should be secure now. You can remove the buckets and test out the swing.
It took me 3 tries before my swing was fully secured. The first time, I tied a different knot and it wasn’t secure enough. The second time, I didn’t tighten the clamps enough. The third time was the charm.
The cushions and fabric for the porch swing are from Patio Lane in the Echo Ash color/fabric. The outdoor pillows are from Pillow My Fancy.

